
Crafty Time art tutorial by Dave Pierik, Shelton-Mason County Journal

News2Go Espresso, part of Happy Tree City (C)CraftyTimeWith Dave 
Paint or use acrylic paint markers for drive-through direction indicators and other details 
The doors and sides are nearly identical front and back. 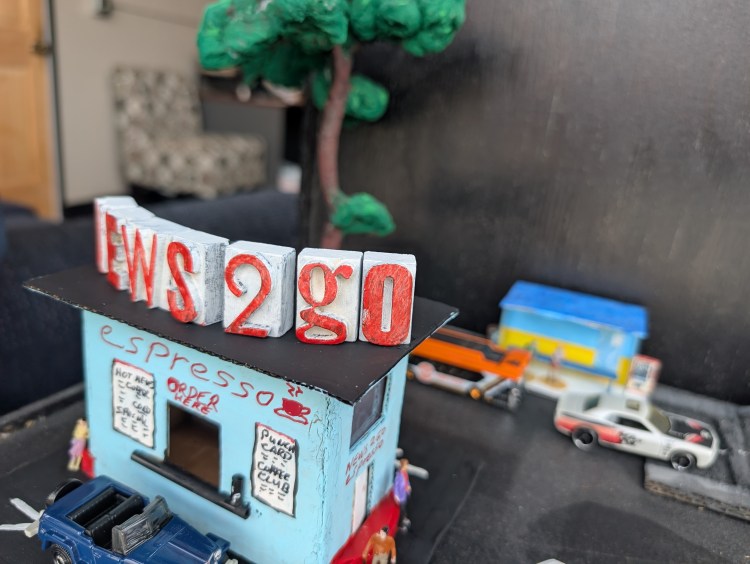
Happy Tree city is a sleepy little village with a lot of drivers who love coffee. 
The growing town is open to public view on the corner of 3rd & Cota Streets in downtown Shelton, WA.
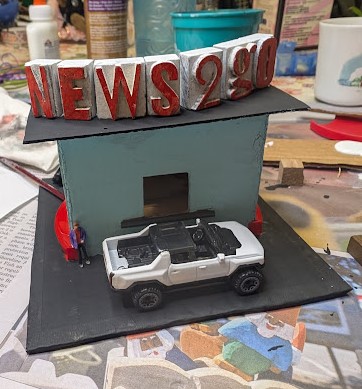
News 2 Go Espresso
Happy Tree Village’s (Hot Wheels) drivers swing by for coffee and a paper.
You will need:
Tools: ruler and markers, scissors, paintbrushes
Materials: cardboard (not too thin), a plastic cottage cheese container lid, masking tape, school glue, acrylic paints, a thin coffee straw, a milk pull lid, clear plastic, Hot Wheels cars. Craft letters and figures are optional.
Cost: about 75 cents worth of glue and paint. The craft letters were another $2 at a thrift store and would have been a lot more new, so maybe $3 total depending on how you count it.
Time: about 6 hours.
1. Plan
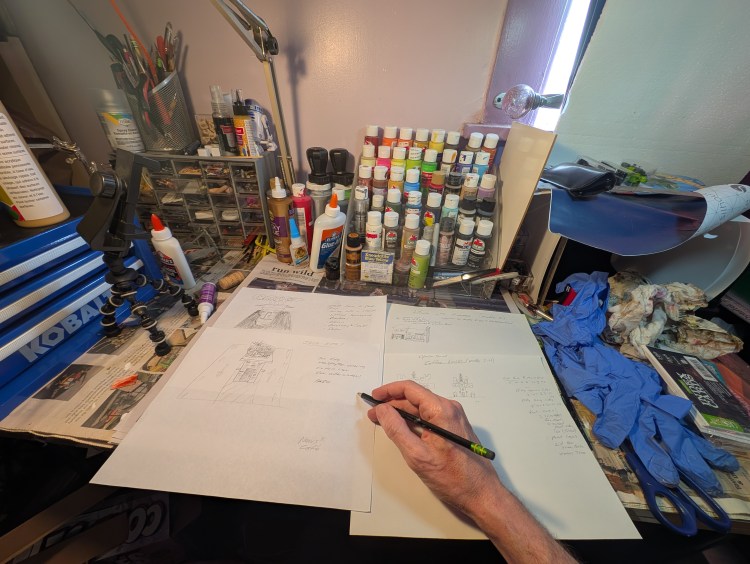
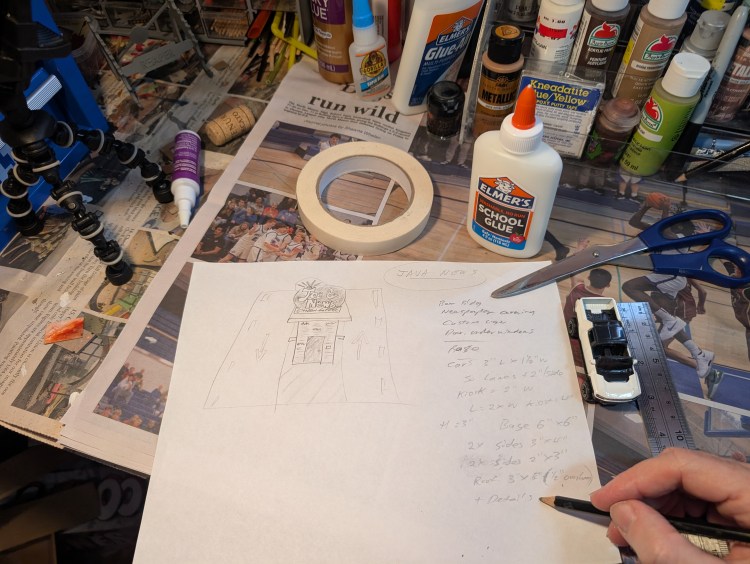
You can start before you think, or you can think before you start. In art, both are good and there’s nothing wrong with improvising. That said, when you’re inspired with an idea, write it down. Make sketches. You can create them later or change them however you like. The weakest pencil is stronger than the strongest memory. I made several sketches several weeks before picking this one to work up for you to try.
2. Measure and mark
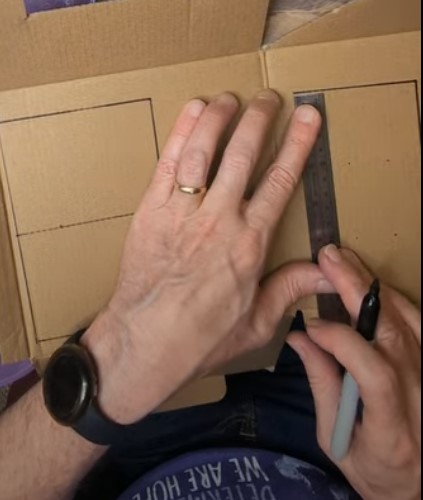

Use a ruler and marker. The square corner of a ruler gives you helpful right angles. A Hummer Hot Wheels Car measures 3” long x 1.5” wide, so we need 2” wide lanes. Espresso kiosks are about a lane wide also, so make a 6” square base divided into 3 lanes 2” wide. Mark 2 sides 3” x 4”, 2 sides 2” x 3” and a roof 3” x 5”.
3. Cut cardboard
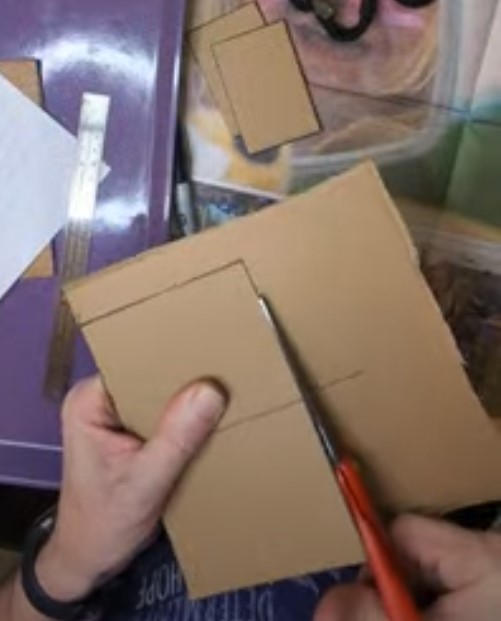
Scissors are sharp. Be careful. 
Cut right along the lines. If you want to cut out windows and doors, you might want to use a craft knife. Be extra careful with them. 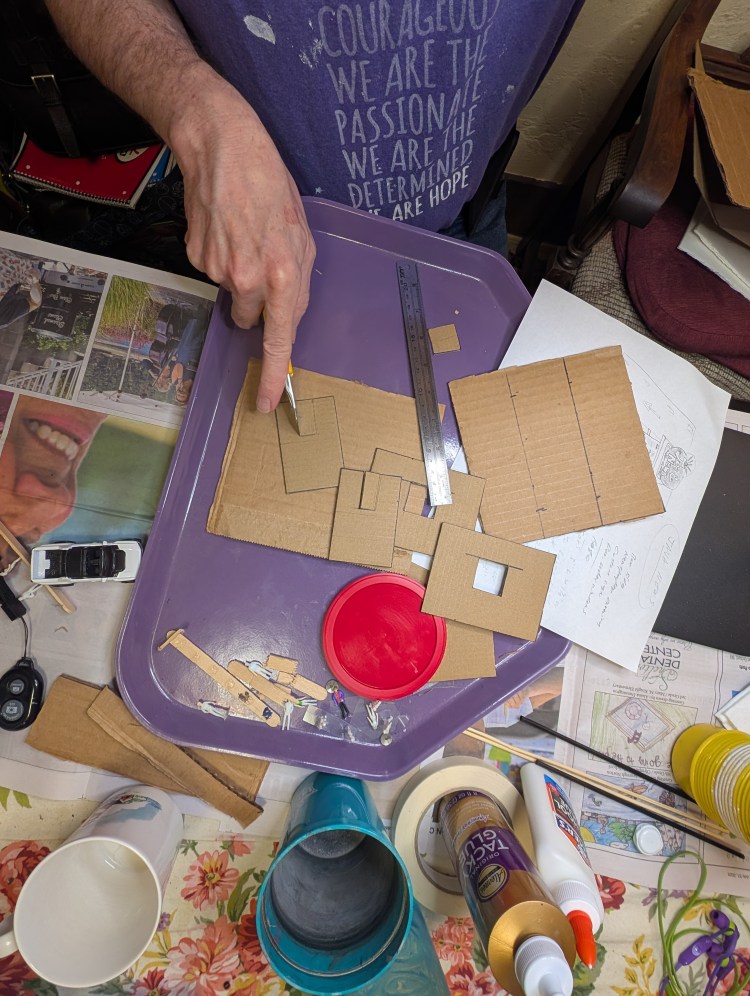
I put an extra layer of thick cardboard, and use a cutting mat or piece of plastic below that. A good craft knife will cut through more than you think. 
Bits of plastic lids can be cut up for details. 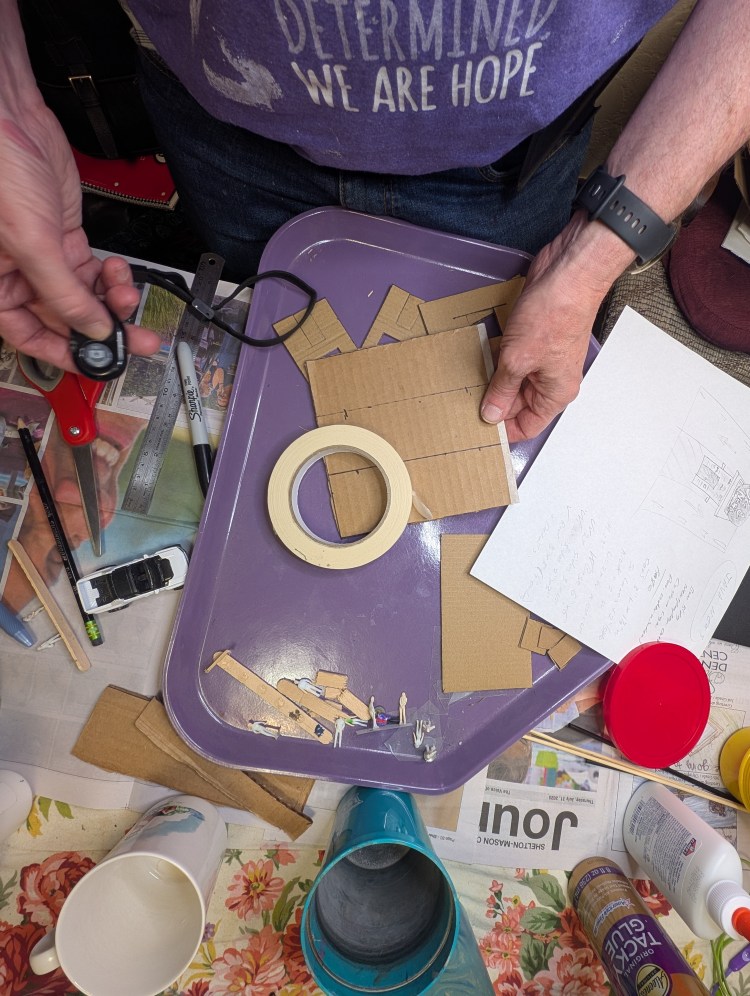
Measure and mark everything 
Cardboard is everywhere. Trust me when I say, you’re not going to run out.
Be safe and don’t rush with your sharp tools. Use scissors to cut right on top of the lines you marked. Cardboard is everywhere, so if you make a mistake don’t hesitate to start over. Thin cardboard from a cracker box is much easier to cut than thick corrugated box cardboard. If you want to cut door and window openings (optional) be careful and go slow with a craft knife, being careful to protect the surface underneath it.
4. Assemble and glue

Stack, test fit and adjust parts. Line the walls up to the marks in the middle of your base. Glue along edges and add masking tape as you go, starting from the sides and then the sides to the base to hold everything in place. Set aside to dry.
5. Remove tape

Well, remove most of it. Carefully peel off the tape where you’ve glued edges. If you used thick corrugated cardboard for the base like I did, put masking tape around the outside edge to tidy that up. You can paint right over it later.
6. Barrier curbs

Mark and cut a wide plastic lid (such as from a cottage cheese container) until it looks and fits the way you want it too. You’ll be painting it later. That said, if you have a choice of different colored lids, pick one that is close to the color you want to make it easier for yourself.
7. Base coats
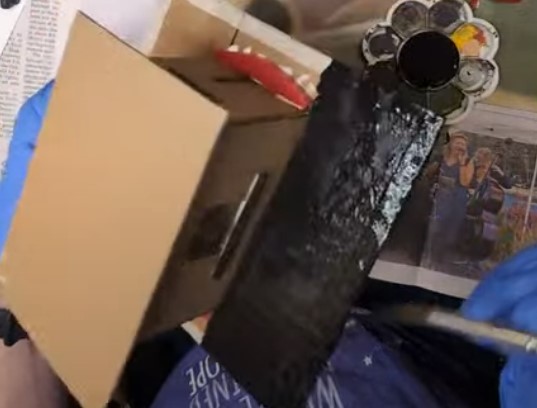
Paint the asphalt and roof black, the building any color you like (I chose light blue this time) and the barrier curbs red or orange. Because it covers everything, I usually save the black for last but looking at the photo I see I didn’t do that this time.
8. Sign letters

If you have craft letters, they pretty work well for signs. If they only come with one each of number and letter of the alphabet, you might have to rethink the kiosk name. News 2 Go was the 4th or 5th name, after Joe & News, Citizen Coffee, Java News and Hot News were considered and dismissed. Test fit for space on top of the building. Base coat letters in white.
9. Dry brush
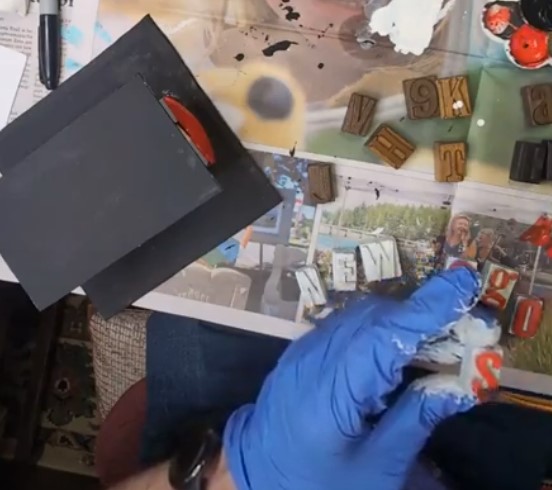

So the red will pop against the white behind it, dab your paintbrush on newspaper before painting the top of each letter so that the paint is not too wet. You only want to cover the top, flat surface. A flat brush works best for this. Paint lightly here, just a thin coat or two.
10. Glue & place

Before you glue, test fit the letters on the roof again. Pick letters up one at a time, use an old brush to apply glue onto the bottom of each one, and put it back exactly where it was as you go. Once they’re all in place, take a look and adjust placement before the glue dries – you have just a few minutes. School glue is water soluble, but it destroys brushes once it dries, so I use dollar store brushes for glue.
11. Paint details

Using a medium round pointed brush, not too full of paint, start with the white. Direction arrows, menu boards and “TIP” on a jar on the drive through shelf (which is a cut down coffee stirrer, glued on). Paint even, straight lines and move the model with your other hand for better control.
12. Final touches

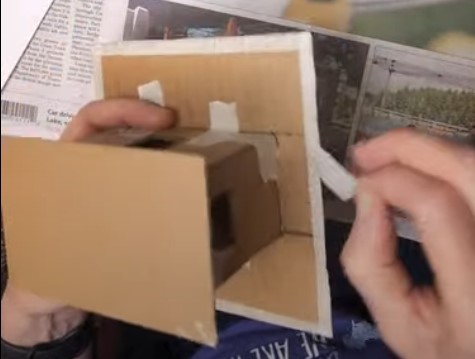
Clear plastic from Hot Wheels packets makes great windows. Glue from the inside. Elmer’s glue dries clear. 
Outline the menu boards in black &/or red using a detail brush. Painting a straight line is the only skill you need. Move the model to make it easier for yourself. 
A cut down coffee stirrer makes a tip jar. Paint T I P in white, to fit. Wipe paint off with a wet paper towel if you need to start over. 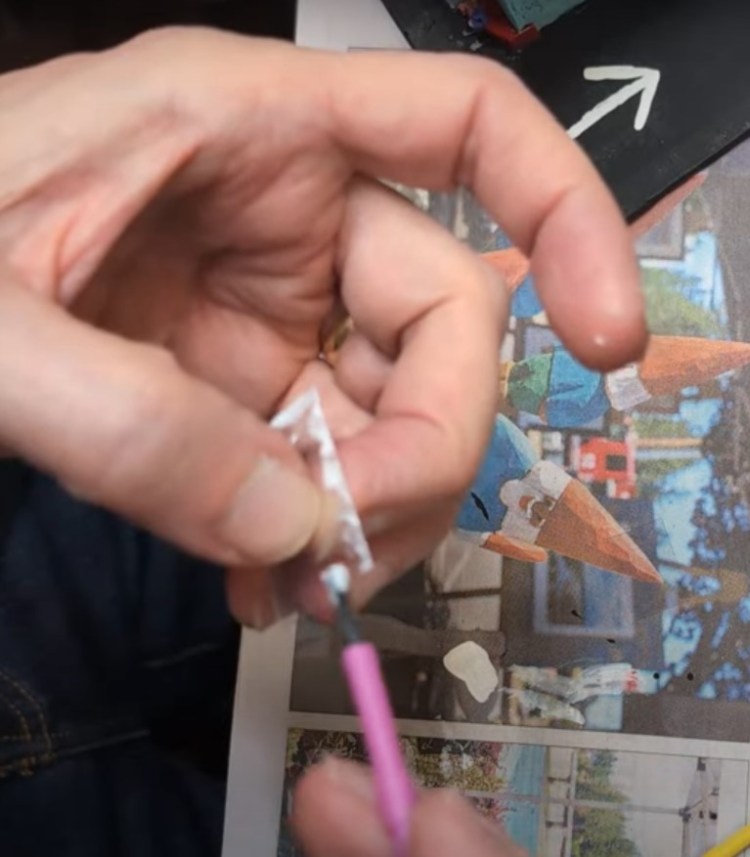
Use a glue brush for better control on the window edges 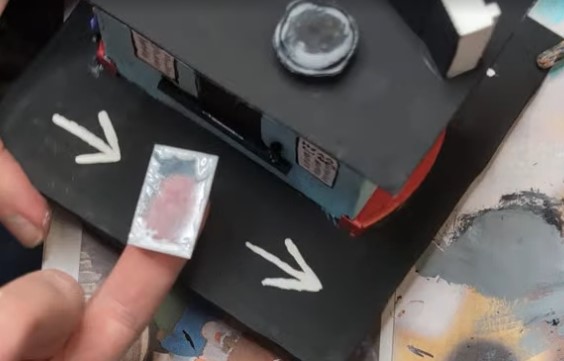
Wet your finger. Glue side up, press the window into the inside part of the window in the building. The “glass” should be at least 1/8″ wider than the opening, in every direction. 
Installing the window. Don’t rush this. 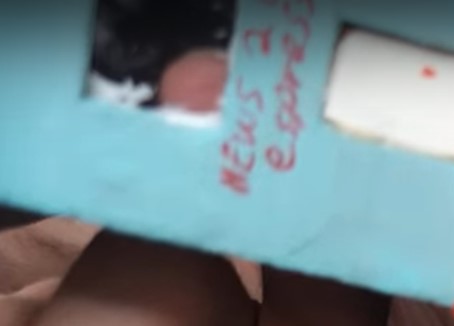
Somehow I got a shot of my finger pushing the window in place from the back side. I got this shot using a cellphone stand. 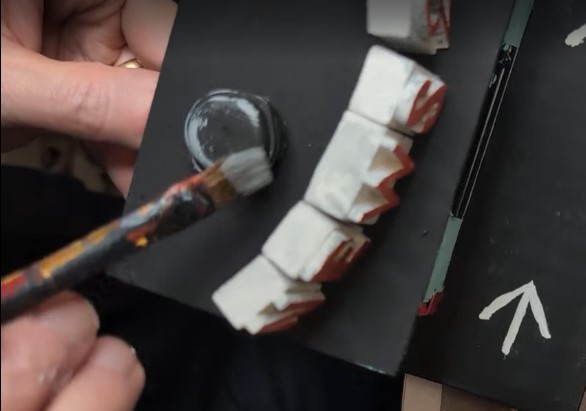
I painted a milk pull black, glued it to the roof, and then dry-brushed it silver-white to bring out the detail of this roof vent. 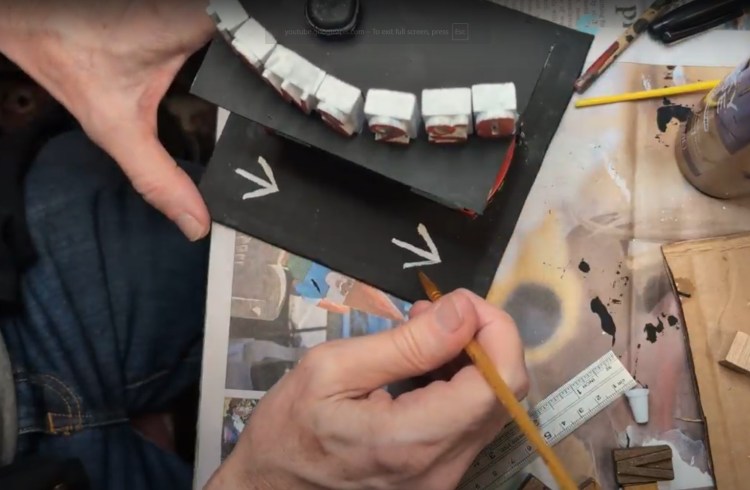
Straight lines are the only thing you need to be able to paint, to get parking lot and driveway markings to look decent. Remember, they use paint in real life too. 
Acrylic paint markers &/or Sharpies work great for the on-building signage and menu boards.
Paint a milk pull lid black and glue it to the roof for a roof vent. Use black and red markers to finish the menu boards, ORDER HERE over the window, and dots for doorknobs. Glue the edges of clear plastic (from a Hot Wheels package) and carefully push it into the back for the windows. Dry brush the roof vent gray. Touch up paint everywhere. Find a place for it and make vroom-vroom sounds with your cars and figures.
13. News 2 Go Espresso


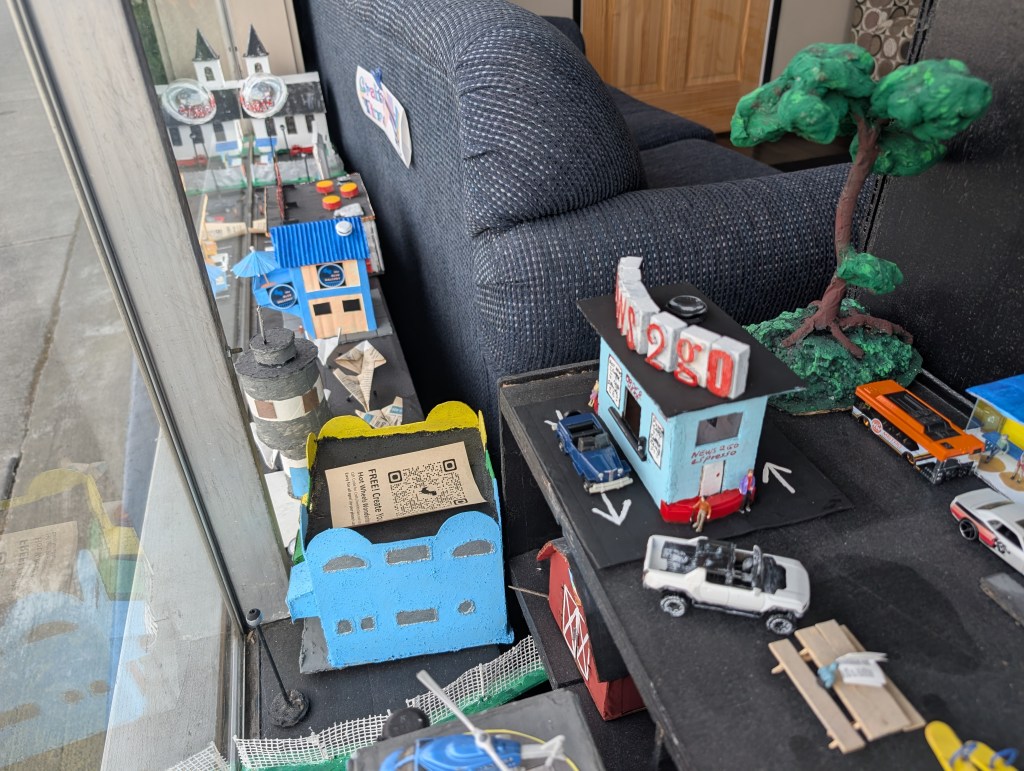
Happy Tree Village has a new spot to grab coffee and a paper. In case you were wondering, the back is nearly the same as the front. Come take a look in the window in downtown Shelton at 3rd & Cota Streets.
14. Crafty Time
What would you like to see next in Crafty Time? Visit www.craftytimewithdave.com for more photos and project ideas. Please email your feedback to dave@masoncounty.com or call 360-426-4412. Visit our office to see the display!
