Letʼs make a camp scene. This newspaper is a great start!
Campgrounds for your Matchbox cars and drivers Happy Tree Villageʼs citizens enjoy going camping. Tools: ruler and markers, scissors, paintbrushes. Optional: hobby knife, garden pruners (to prune something if you donʼt have twigs) Materials: cardboard, newspaper, twigs, masking tape, school glue, acrylic paints, mirror, Styrofoam, paper clips, string, sand. Difficulty: Easy/Moderate Cost: About $1, including paint and glue (not counting car or fi gures) Time: three to six hours
1. Base and Hills
Base and hills: Plan. Cut a 7” x 8” piece of corrugated cardboard. Rip some 4”-7” pieces of newspaper, wad them up and glue them down, remembering to leave some flat area. Rip more pieces of newspaper and glue and press the flat layers over the wadded paper. Basecoat with brown and green paint mixed with school glue. Let dry.
2. Trees
Trees: Find or prune some small dry sticks with branches, about 6” tall. With a pencil or craft knife, bore holes into the newspaper hills, poke sticks in and add glue and small wads of paper until the sticks stand on their own. Let dry. Rip and wad up several approx. 3-6” round-edged pieces of newspaper and glue them atop the sticks. Let dry. Mix dark green paint with glue and paint the foliage, then highlight in light green.
3. Tents
Tents: Straighten two small paper clips per tent. Bend into tent poles, crossing to a + shape on top. Add a square of masking tape to hold in place. Cut down newspaper, drape on top and trim with scissors until you have a tent shape. Tape and glue in place. Base coat white mixed with glue. Once dry, paint in a dark shadow color followed by a light highlight of the same color. Paint a black triangle for the tent opening.
4. Details
Details:Trail – flock with glue dusted by sand. Paint. Fishing hole: Glue something shiny. Give the shore a natural look with small bits of paper around the edge and paint to match the surrounding area. Reeds: cut down the long bristles of an old paintbrush, paint with a mix of green paint and glue, and glue in place next to the water using tweezers. Hammock: glue layers of newspaper into a hammock shape, tie with string to trees and reinforce with glue. Plastic canvas is useful for tying hammock corners. Fishing poles: cut down toothpicks, add string and glue in place. Coolers: carefully cut Styrofoam and/or craft foam with a hobby knife, prime the base in white paint mixed with glue, and glue in place.
5. Camping
Camping: Camping is a good time. Fishing, hiking, or reading on a hammock. Craft your own version of this scene and you can picture it all, no bug spray required. I have fond memories of camping as a Boy Scout and also with family. This scene is inspired by those times, and by the Visitor Guide to Mason County. What would you like to see next in Crafty Time with Dave? Visit http://www.craftytimewithdave.com for more photos and project ideas. Email your feedback to dave@masoncounty.com or call 360-426-4412. Visit the Shelton-Mason County Journaloffice at 3rd & Cota, downtown Shelton to see Dave Pierik’s Happy Tree Village Hot Wheels and Matchbox display!
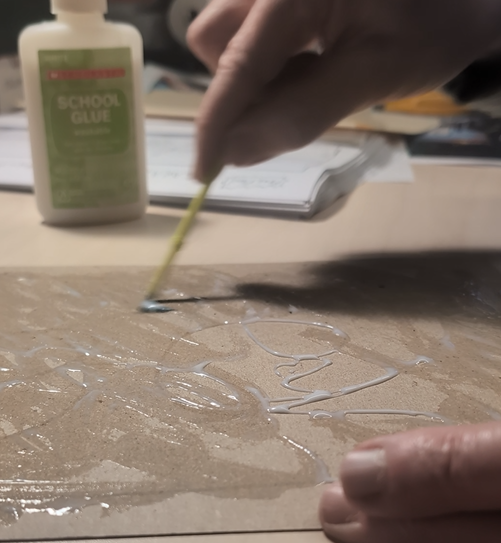
A layer of wet school glue on cardboard ready to put the pattern on
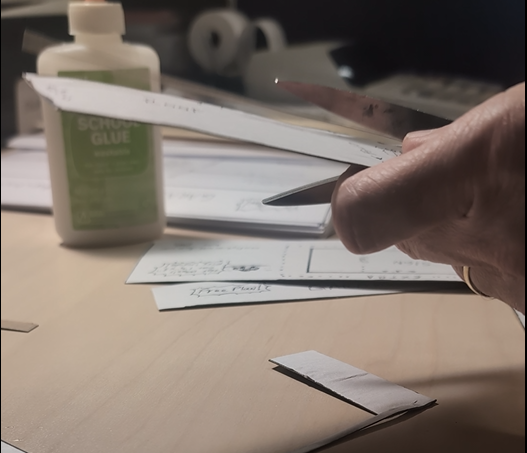
Gluing a paper pattern template onto flat cardboard
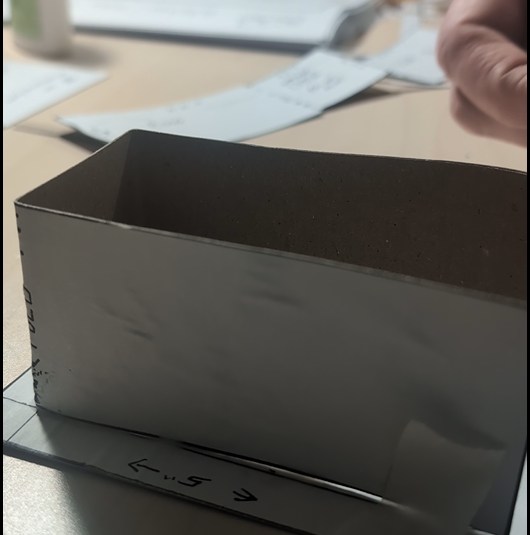
1. Cut pieces
Base, 3 walls (one piece), roof. Optional: sign.
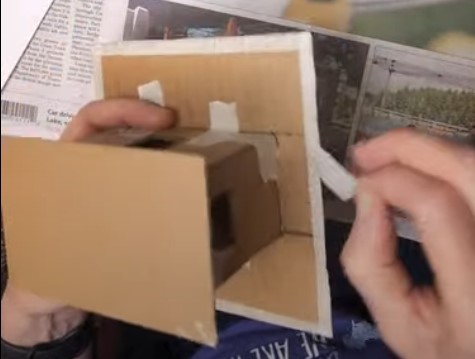
Fold the 3 wall piece and glue it to the base
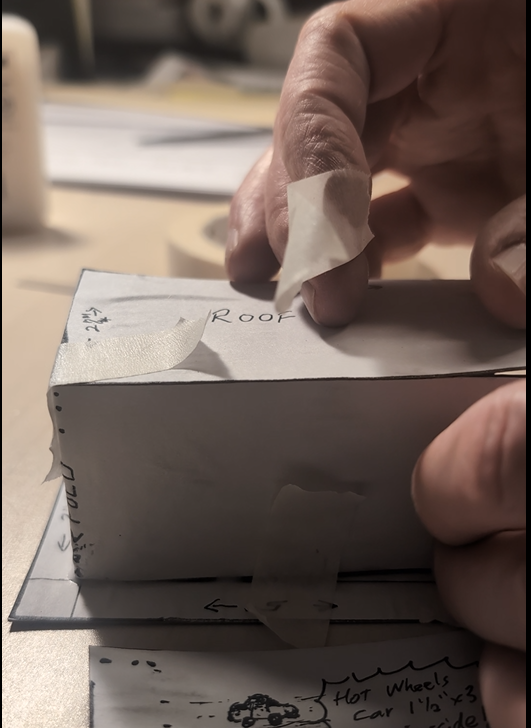
Glue top of walls for the roof piece
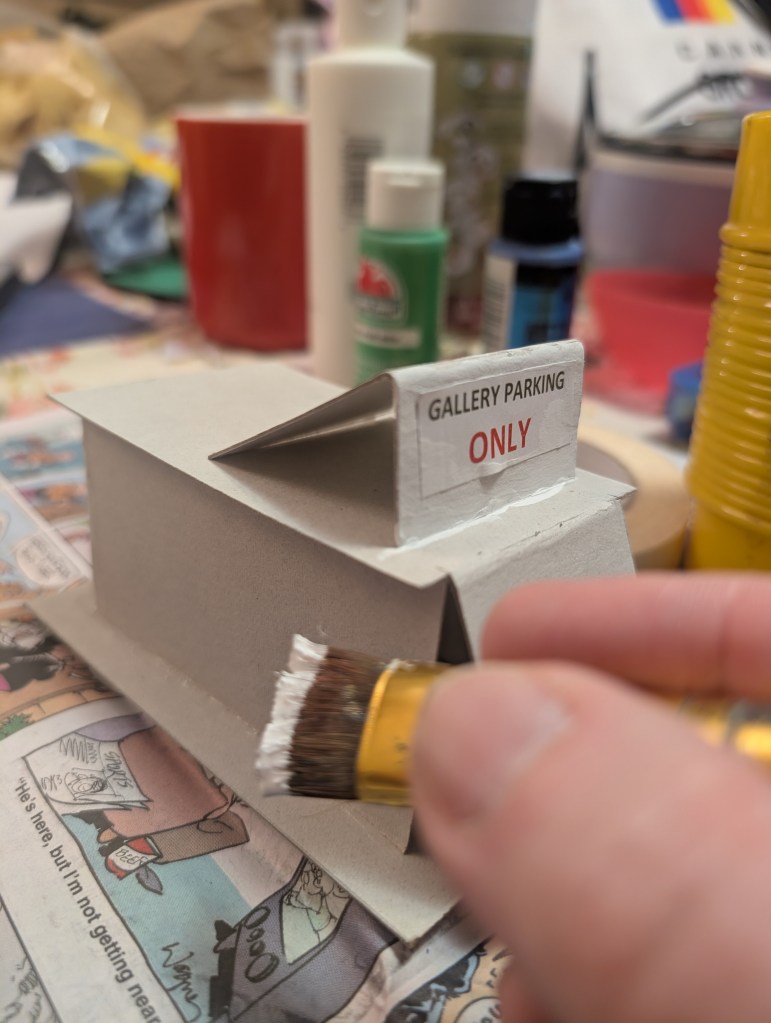
Fold the roof & door piece and glue to top of walls. Don’t glue the door down
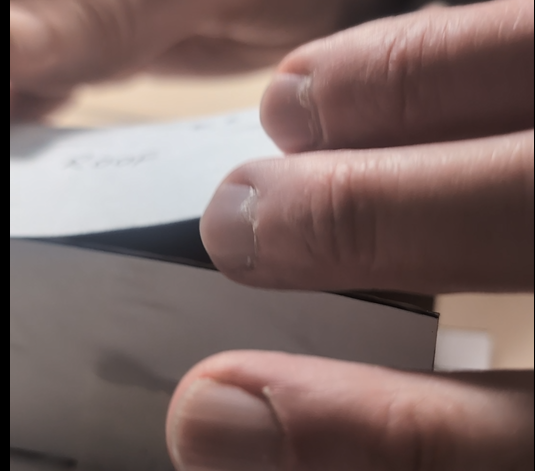
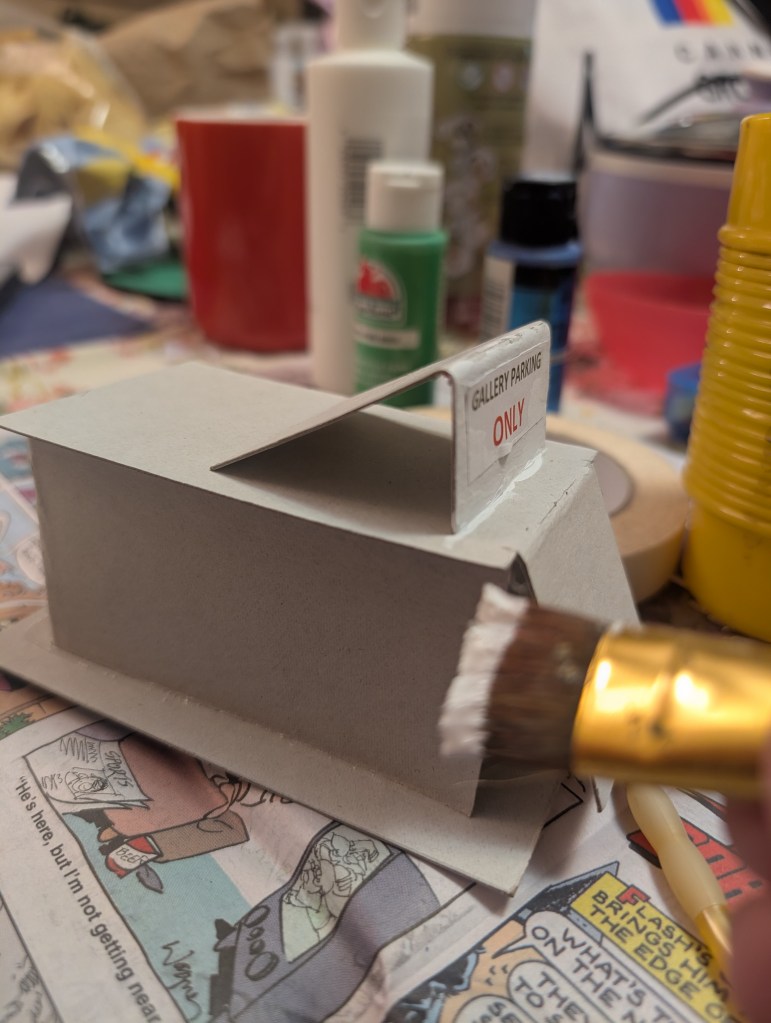
Align and hold the roof in place
Masking tape holds pieces in place. Remove tape when glue dries.
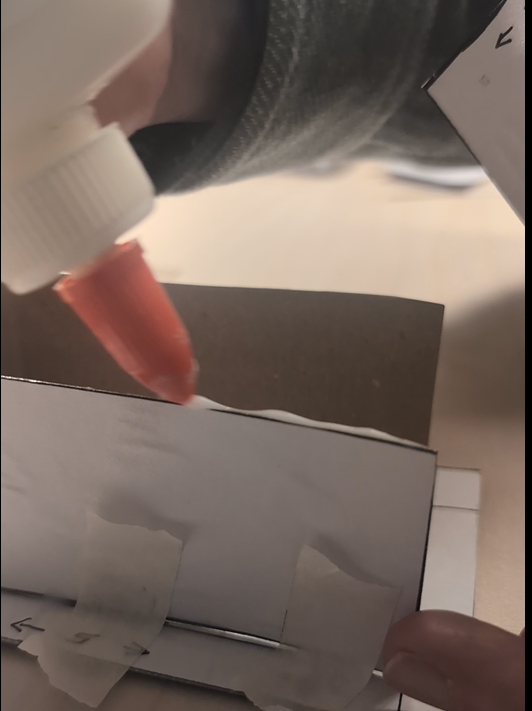
2. Glue and tape
Fold the 3 walls on the dotted lines and glue them to the base. Fold the roof-garage door piece and glue to tops of the 3 walls, but don’t glue the door down. Optional: fold the sign and glue on top of the roof. Use masking tape to hold everything in place until the glue dries. Once it dries, peel the masking tape back off.
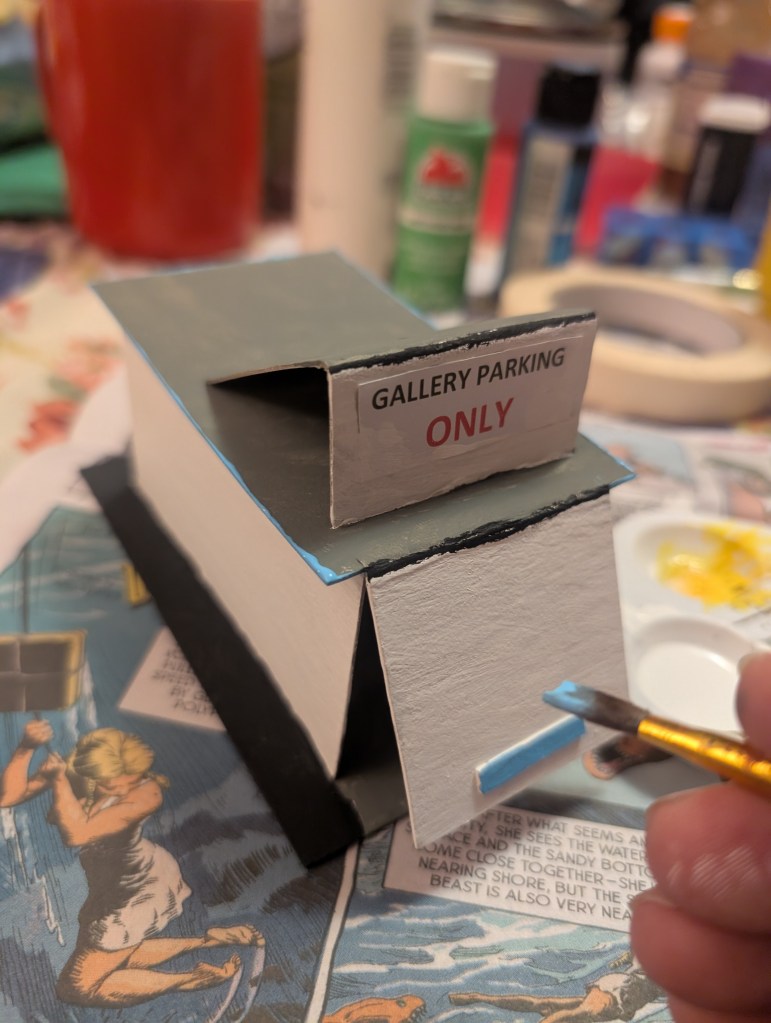
3. Paint
Once glue is dry, paint. It’s a good idea to prime everything with white paint first and let that dry, then paint any colors you like. You can also use markers or stickers, anything you want!
4. Optional: extras
Look at real garages. Some have roof vents and things on top. Plastic milk pulls make good roof vents. You can make chimneys out of a few pieces of cardboard glued together. Small bits of cardboard can make a garage door handle, windows and doors. Small bendy straws make good gutter downspouts. It’s a bit easier to add bits before you paint, but it’s also OK to glue details on later, and paint again as you touch up.
5. Garages
Happy Tree Village has some working garages now. What a great place for cars to go!
Crafty Time art tutorial by Dave Pierik, Shelton-Mason County Journal
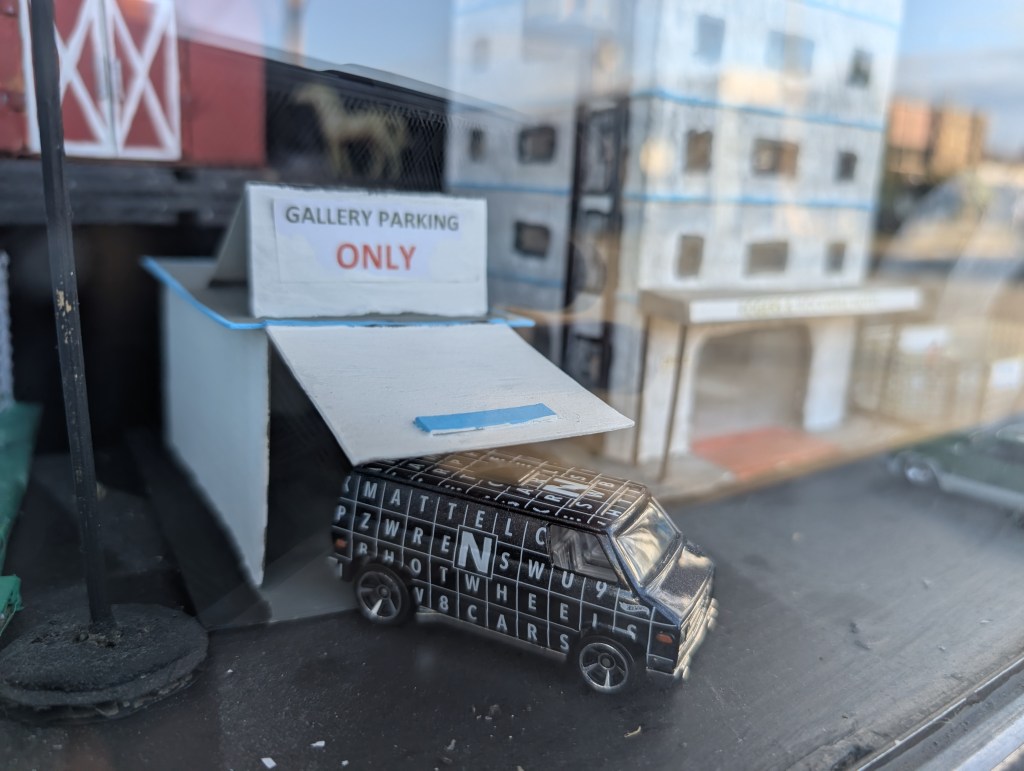
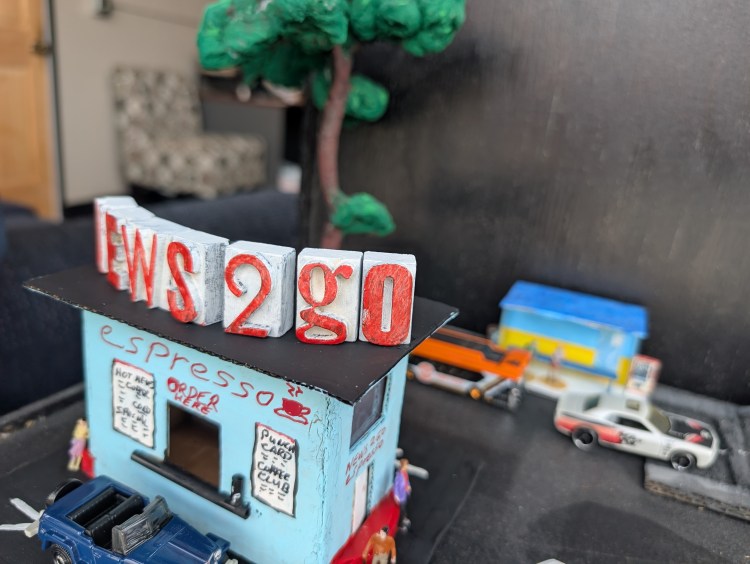
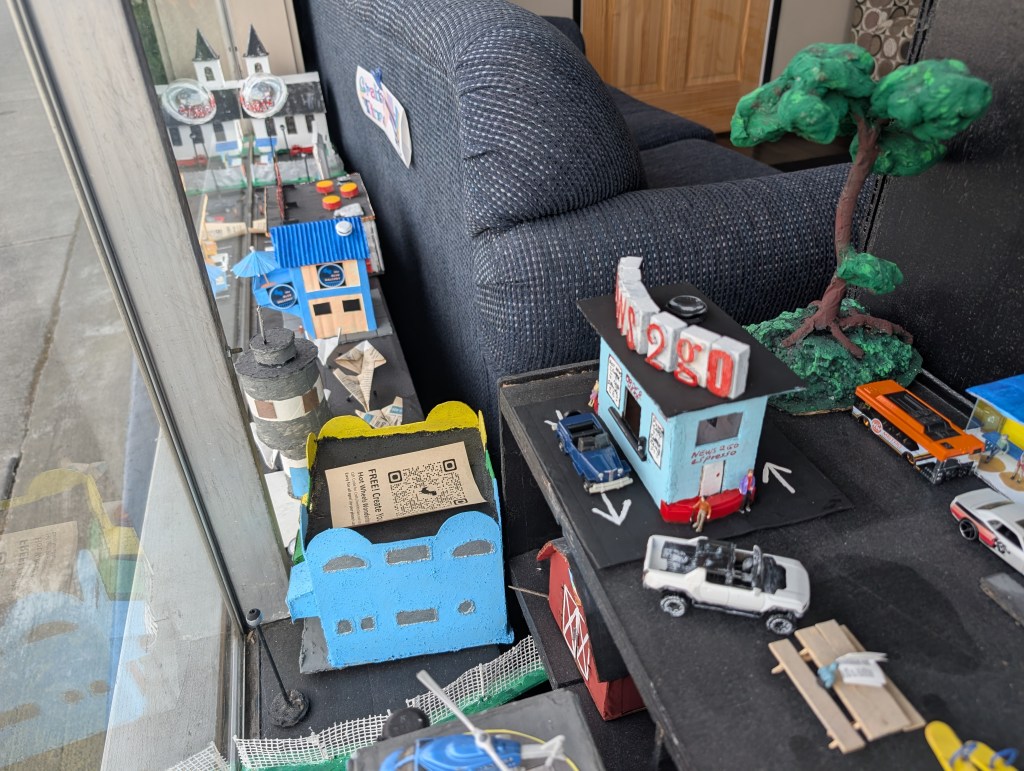
News2Go Espresso, part of Happy Tree City (C)CraftyTimeWith Dave
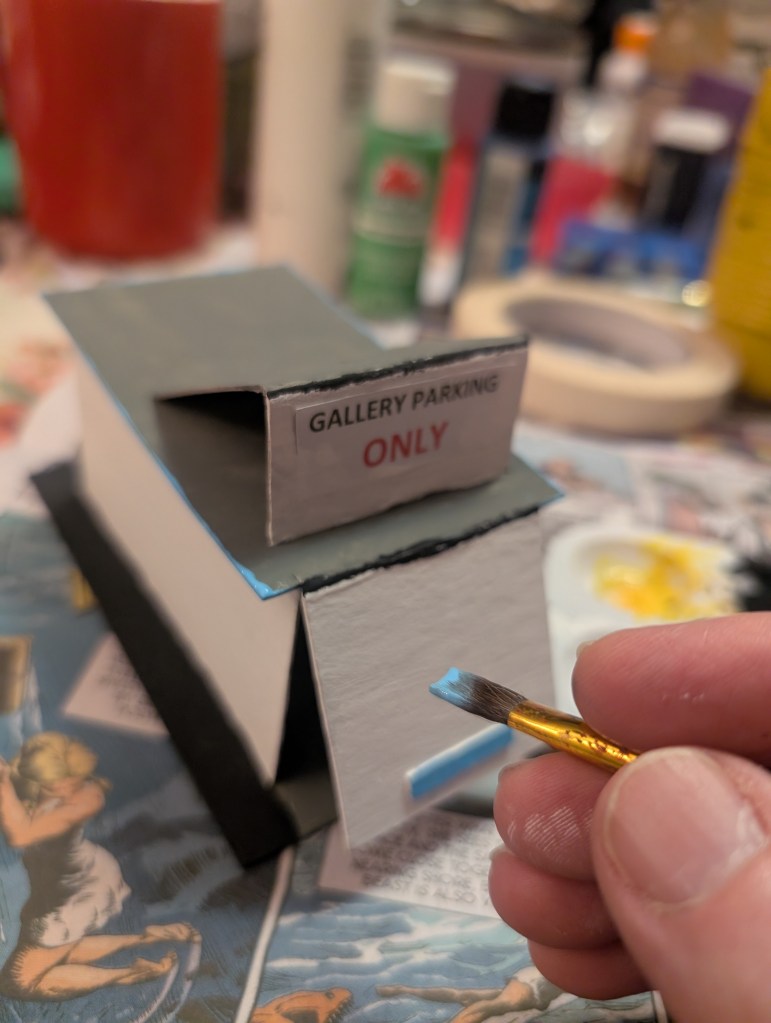
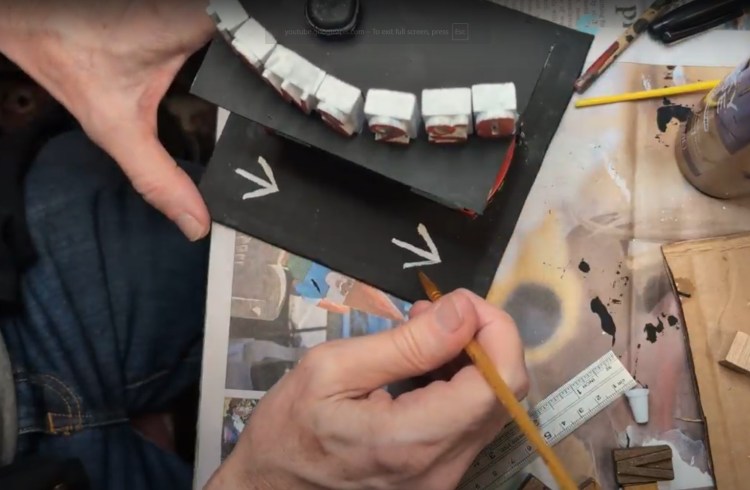
Paint or use acrylic paint markers for drive-through direction indicators and other details
The doors and sides are nearly identical front and back.
Happy Tree city is a sleepy little village with a lot of drivers who love coffee.
The growing town is open to public view on the corner of 3rd & Cota Streets in downtown Shelton, WA.
News 2 Go Espresso
Happy Tree Village’s (Hot Wheels) drivers swing by for coffee and a paper.
You will need:
Tools: ruler and markers, scissors, paintbrushes
Materials: cardboard (not too thin), a plastic cottage cheese container lid, masking tape, school glue, acrylic paints, a thin coffee straw, a milk pull lid, clear plastic, Hot Wheels cars. Craft letters and figures are optional.
Cost: about 75 cents worth of glue and paint. The craft letters were another $2 at a thrift store and would have been a lot more new, so maybe $3 total depending on how you count it.
Time: about 6 hours.
1. Plan
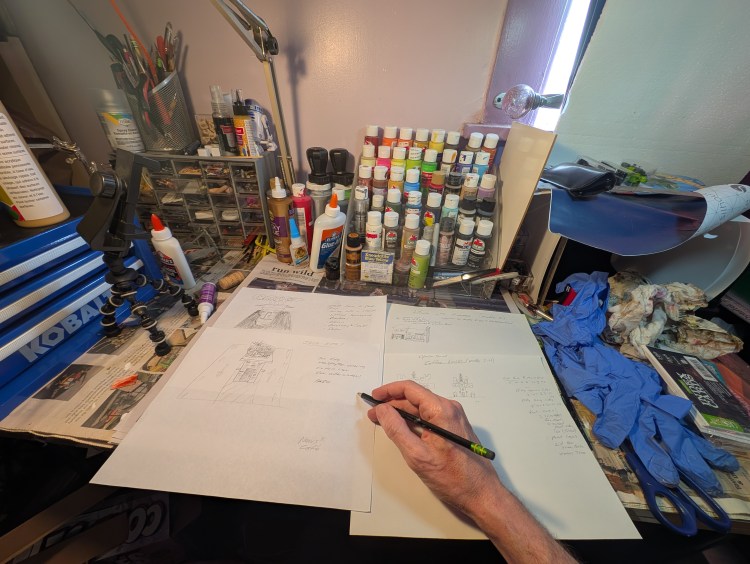
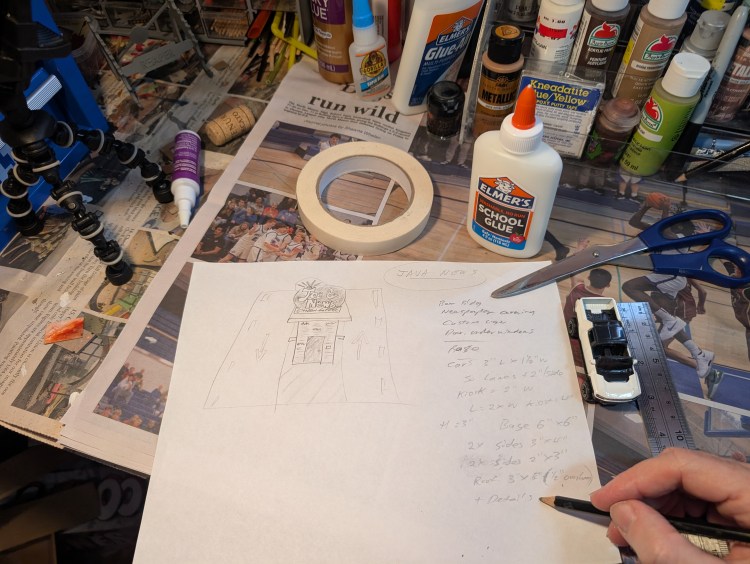
Sketches are a helpful start for planning what to create next.
I like to think about Happy Tree city’s imaginary people, and what they would like next for their town
You can start before you think, or you can think before you start. In art, both are good and there’s nothing wrong with improvising. That said, when you’re inspired with an idea, write it down. Make sketches. You can create them later or change them however you like. The weakest pencil is stronger than the strongest memory. I made several sketches several weeks before picking this one to work up for you to try.
2. Measure and mark
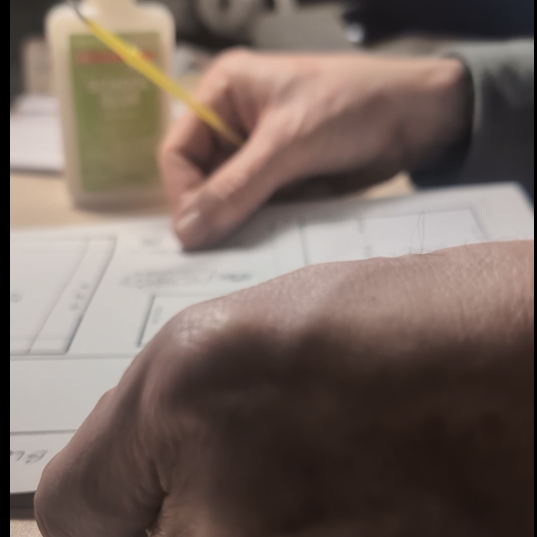
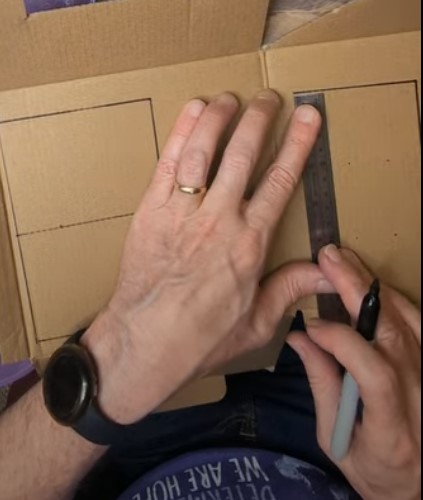
I measure, mark dots and then draw lines, usually in Sharpie so it will be visible in photos like this.
Measuring is an important step for planning. It’s important so don’t guess and don’t forget.
Use a ruler and marker. The square corner of a ruler gives you helpful right angles. A Hummer Hot Wheels Car measures 3” long x 1.5” wide, so we need 2” wide lanes. Espresso kiosks are about a lane wide also, so make a 6” square base divided into 3 lanes 2” wide. Mark 2 sides 3” x 4”, 2 sides 2” x 3” and a roof 3” x 5”.
3. Cut cardboard
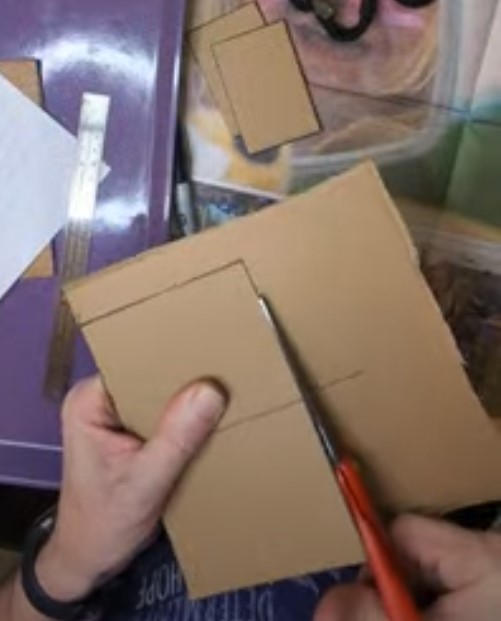
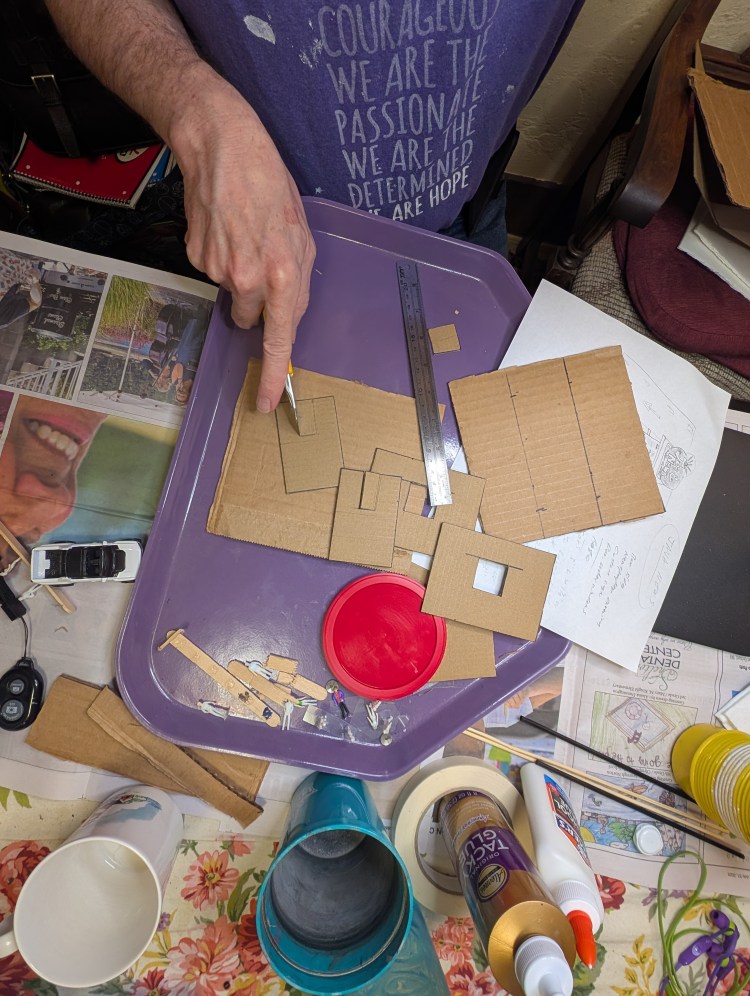
Scissors are sharp. Be careful.
Cut right along the lines. If you want to cut out windows and doors, you might want to use a craft knife. Be extra careful with them.
I put an extra layer of thick cardboard, and use a cutting mat or piece of plastic below that. A good craft knife will cut through more than you think.
Bits of plastic lids can be cut up for details.
Measure and mark everything
Cardboard is everywhere. Trust me when I say, you’re not going to run out.
Be safe and don’t rush with your sharp tools. Use scissors to cut right on top of the lines you marked. Cardboard is everywhere, so if you make a mistake don’t hesitate to start over. Thin cardboard from a cracker box is much easier to cut than thick corrugated box cardboard. If you want to cut door and window openings (optional) be careful and go slow with a craft knife, being careful to protect the surface underneath it.
4. Assemble and glue
Glue all the edges and line the walls up right on top of the lines you made in Sharpie. Be patient and pay close attention to what you’re doing.
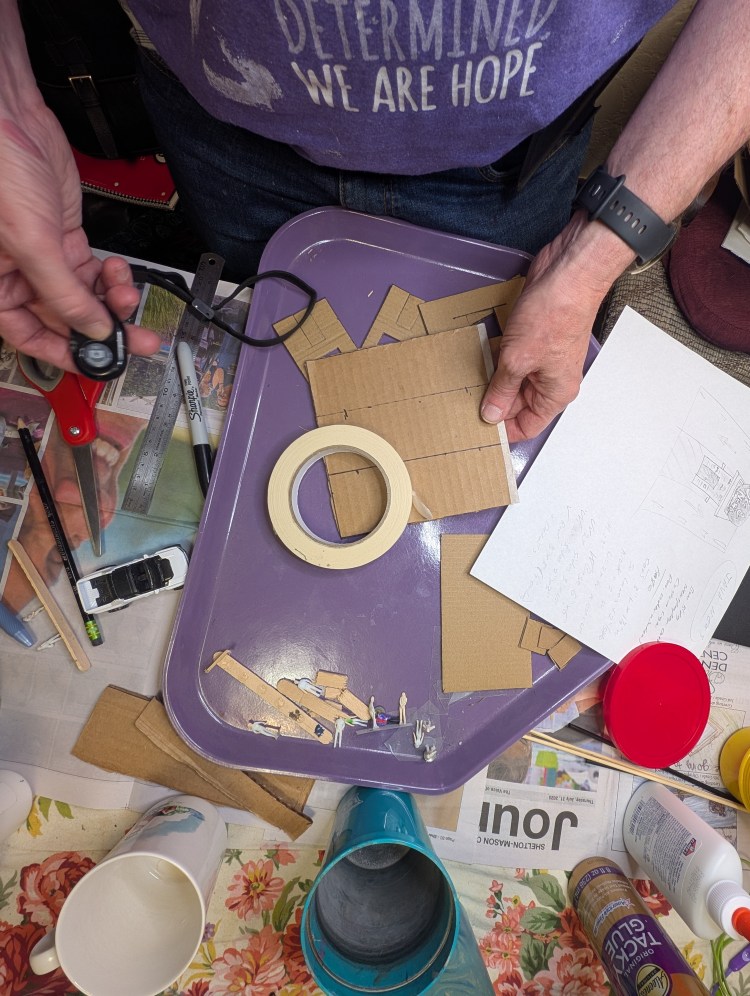
Stack, test fit and adjust parts. Line the walls up to the marks in the middle of your base. Glue along edges and add masking tape as you go, starting from the sides and then the sides to the base to hold everything in place. Set aside to dry.
5. Remove tape
Masking tape holds your glued walls together with the placement you want. Once the glue is dry, slowly pull the tape off, at an angle
Tape also cleans up the corrugated edges of thick cardboard for a cleaner look.
Well, remove most of it. Carefully peel off the tape where you’ve glued edges. If you used thick corrugated cardboard for the base like I did, put masking tape around the outside edge to tidy that up. You can paint right over it later.
6. Barrier curbs
A sour cream lid ridge has just the right curve, color and shape for a barrier curb. It will be painted red much more easily since it’s already read.
Mark and cut a wide plastic lid (such as from a cottage cheese container) until it looks and fits the way you want it too. You’ll be painting it later. That said, if you have a choice of different colored lids, pick one that is close to the color you want to make it easier for yourself.
7. Base coats
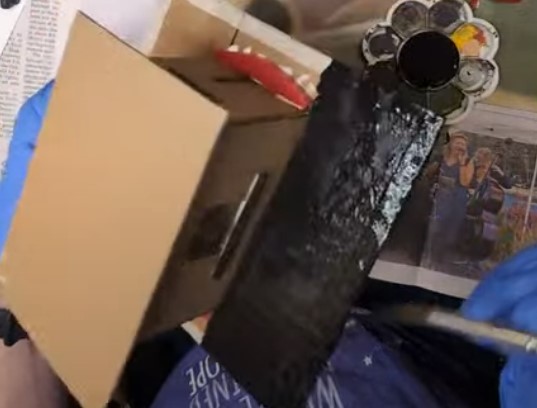
Asphalt and commercial roofs can usually be black. Start with one coat, you can always touch up later. One coat will also work, right on the cardboard, for most building colors. For brighter buildings, basecoat the entire model in white, wait for it to dry completely and then add your base colors over that.
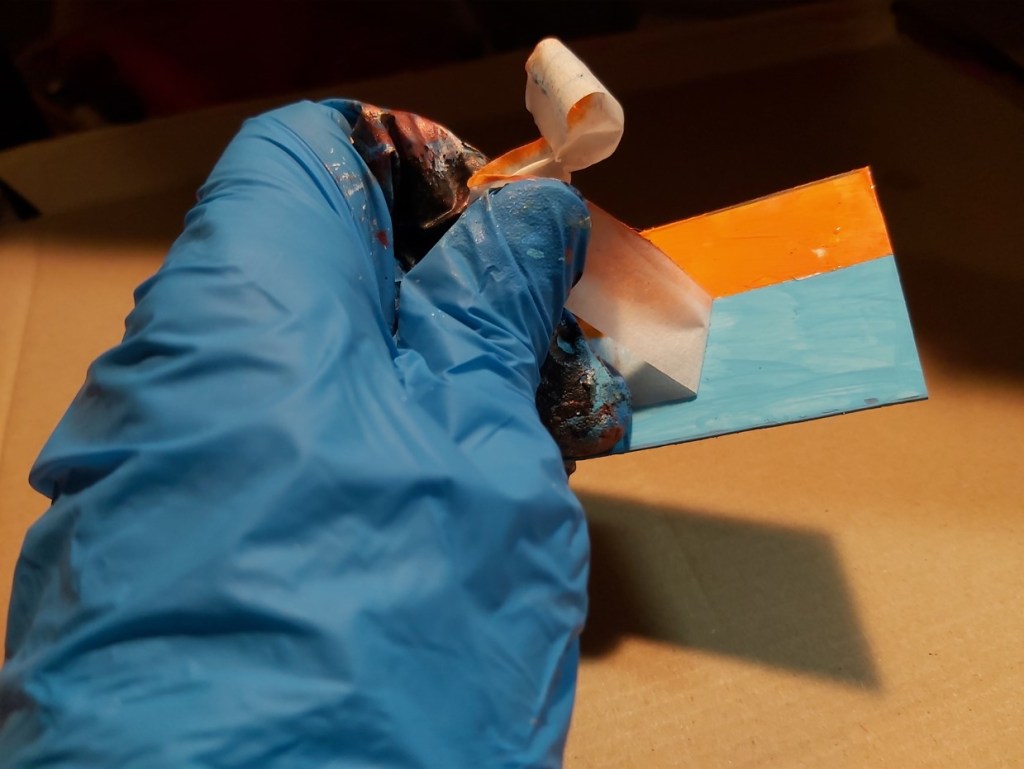
Paint the asphalt and roof black, the building any color you like (I chose light blue this time) and the barrier curbs red or orange. Because it covers everything, I usually save the black for last but looking at the photo I see I didn’t do that this time.
8. Sign letters
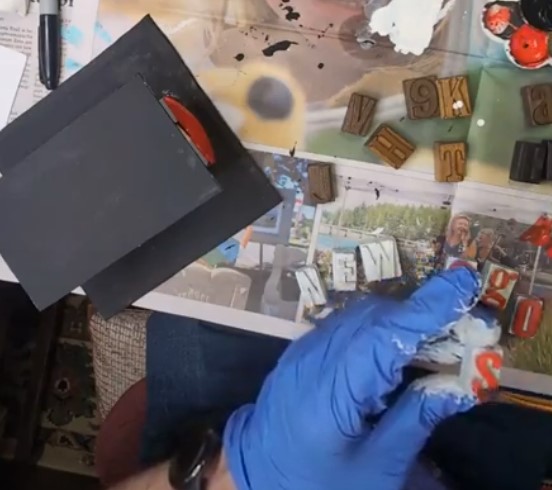
You can paint detailed parts of models either on, or off the model. This time, I painted the detailed sign letters first, and then glued them in place after they were dry. Rubber gloves are optional but they do keep your hands a lot cleaner.
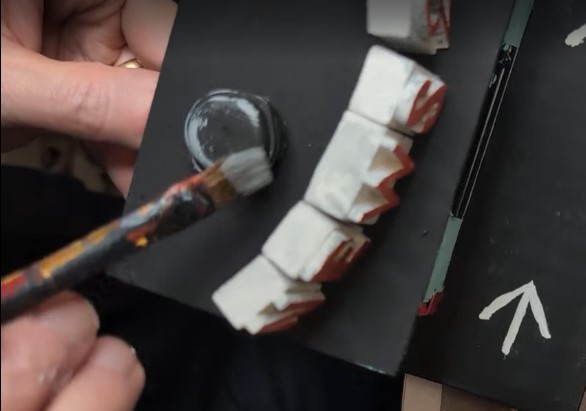
If you have craft letters, they pretty work well for signs. If they only come with one each of number and letter of the alphabet, you might have to rethink the kiosk name. News 2 Go was the 4th or 5th name, after Joe & News, Citizen Coffee, Java News and Hot News were considered and dismissed. Test fit for space on top of the building. Base coat letters in white.
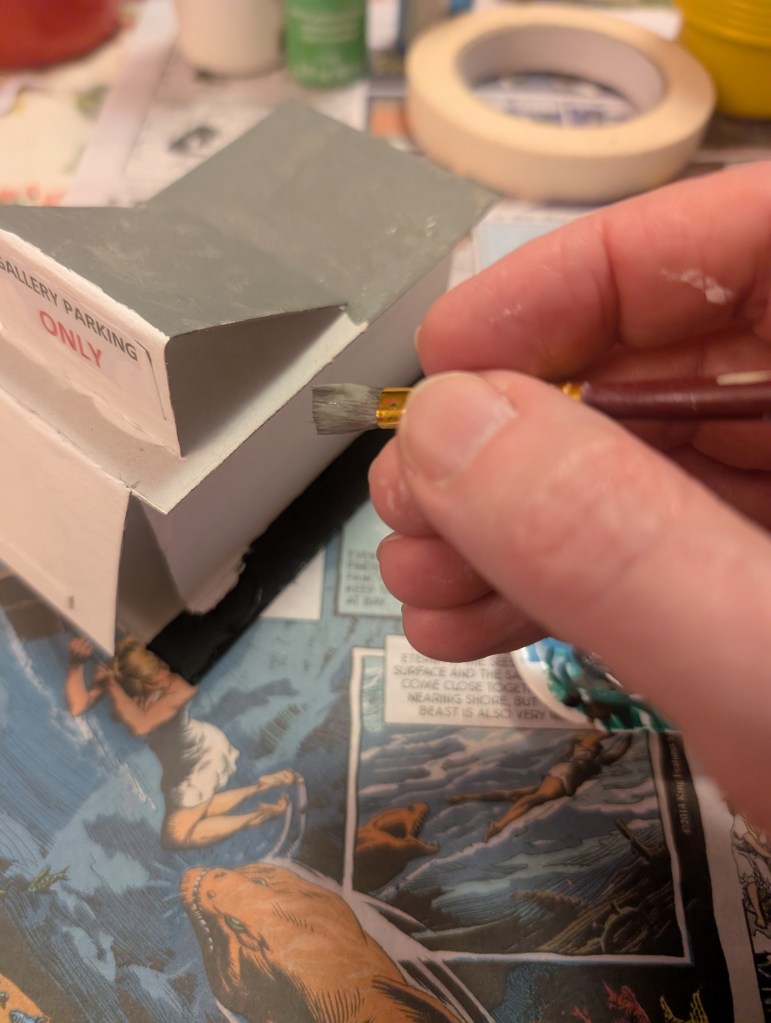
9. Dry brush
Painting is messy work. Put newspaper down. Protect surfaces. That said, acrylic paints are water soluble. If you get paint on your cloths, spot clean with soap and water right away.Coffee kiosks are not big. Be sure to test fit height for the pass-through window and have it be a bit longer than your longest model car. Note the coffee stirrer pass through window shelf. These letters looked better to me on a curve than in a straight line.
So the red will pop against the white behind it, dab your paintbrush on newspaper before painting the top of each letter so that the paint is not too wet. You only want to cover the top, flat surface. A flat brush works best for this. Paint lightly here, just a thin coat or two.
10. Glue & place
Pay attention to each letter.
Before the glue dries, taka a look and make sure the letters are where you want them.
Before you glue, test fit the letters on the roof again. Pick letters up one at a time, use an old brush to apply glue onto the bottom of each one, and put it back exactly where it was as you go. Once they’re all in place, take a look and adjust placement before the glue dries – you have just a few minutes. School glue is water soluble, but it destroys brushes once it dries, so I use dollar store brushes for glue.
11. Paint details
Basecoat menu boards white. Wait for the paint to dry before adding information freehand. Detail does not have to be perfect, it will mostly be seen from a distance.
Using a medium round pointed brush, not too full of paint, start with the white. Direction arrows, menu boards and “TIP” on a jar on the drive through shelf (which is a cut down coffee stirrer, glued on). Paint even, straight lines and move the model with your other hand for better control.
12. Final touches
Clear plastic from Hot Wheels packets makes great windows. Glue from the inside. Elmer’s glue dries clear.
Outline the menu boards in black &/or red using a detail brush. Painting a straight line is the only skill you need. Move the model to make it easier for yourself.
A cut down coffee stirrer makes a tip jar. Paint T I P in white, to fit. Wipe paint off with a wet paper towel if you need to start over.
Use a glue brush for better control on the window edges
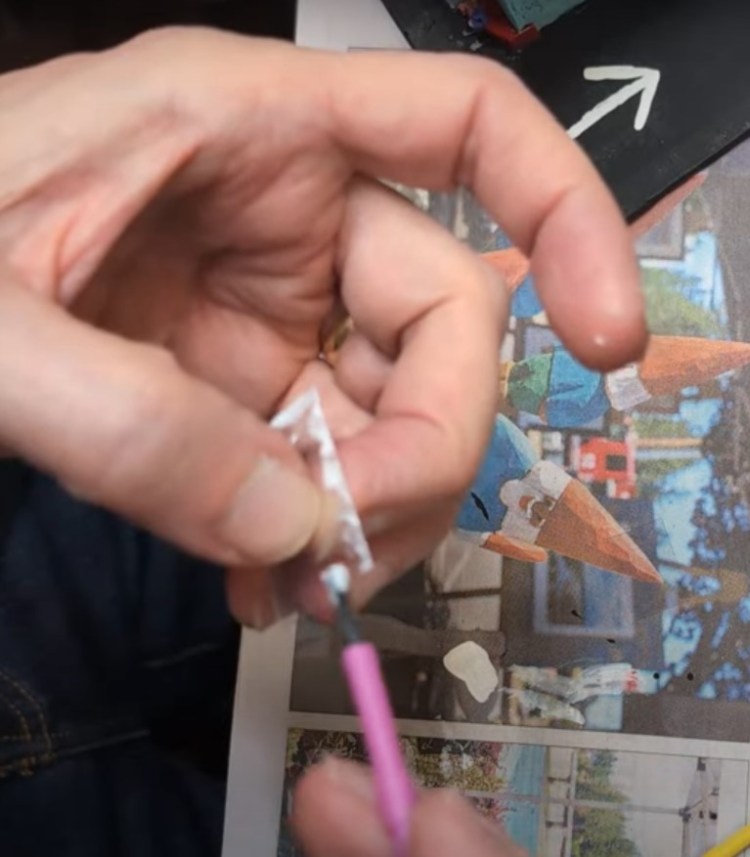
Wet your finger. Glue side up, press the window into the inside part of the window in the building. The “glass” should be at least 1/8″ wider than the opening, in every direction.
Installing the window. Don’t rush this.
Somehow I got a shot of my finger pushing the window in place from the back side. I got this shot using a cellphone stand.
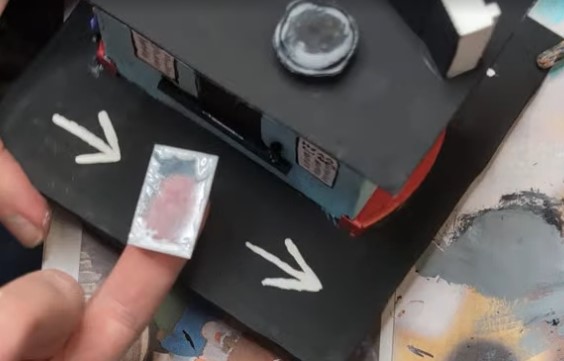
I painted a milk pull black, glued it to the roof, and then dry-brushed it silver-white to bring out the detail of this roof vent.
Straight lines are the only thing you need to be able to paint, to get parking lot and driveway markings to look decent. Remember, they use paint in real life too.
Acrylic paint markers &/or Sharpies work great for the on-building signage and menu boards.
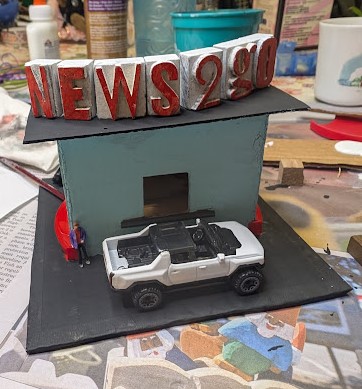
Paint a milk pull lid black and glue it to the roof for a roof vent. Use black and red markers to finish the menu boards, ORDER HERE over the window, and dots for doorknobs. Glue the edges of clear plastic (from a Hot Wheels package) and carefully push it into the back for the windows. Dry brush the roof vent gray. Touch up paint everywhere. Find a place for it and make vroom-vroom sounds with your cars and figures.
13. News 2 Go Espresso
Happy Tree Village has a new spot to grab coffee and a paper. In case you were wondering, the back is nearly the same as the front. Come take a look in the window in downtown Shelton at 3rd & Cota Streets.
What would you like to see next in Crafty Time? Visit www.craftytimewithdave.com for more photos and project ideas. Please email your feedback to dave@masoncounty.com or call 360-426-4412. Visit our office to see the display!
Materials: Cardboard, white glue, bamboo skewers, clear plastic, paint.
Difficulty: moderate to advanced
Cost: less than $5 including paint and glue Time: Four to six hours or more of fun!
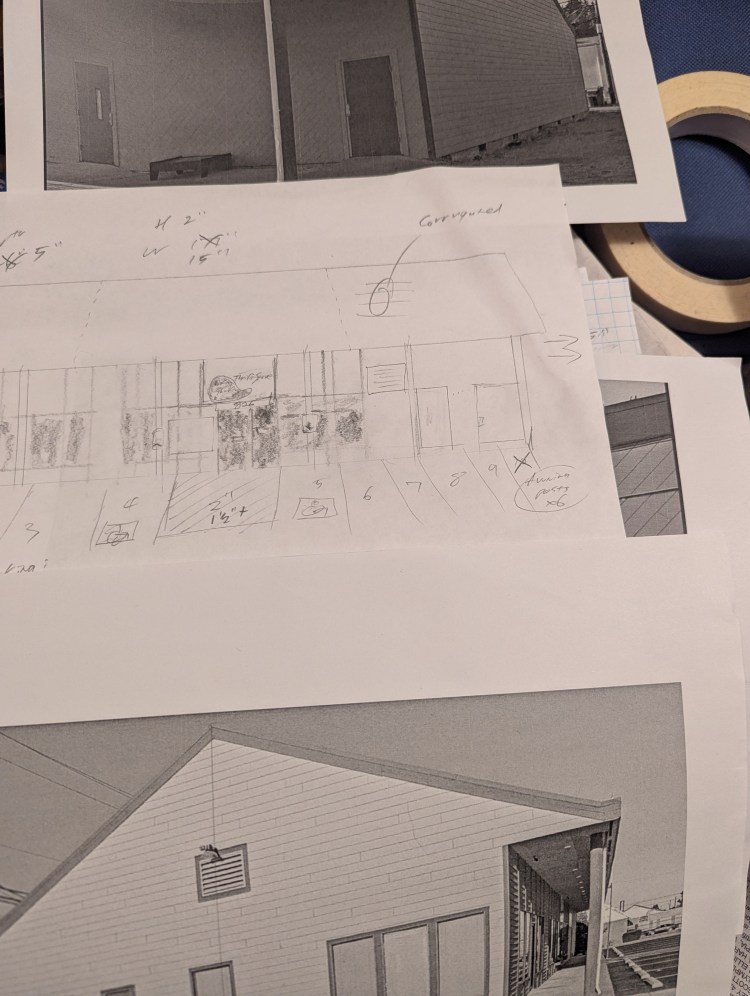
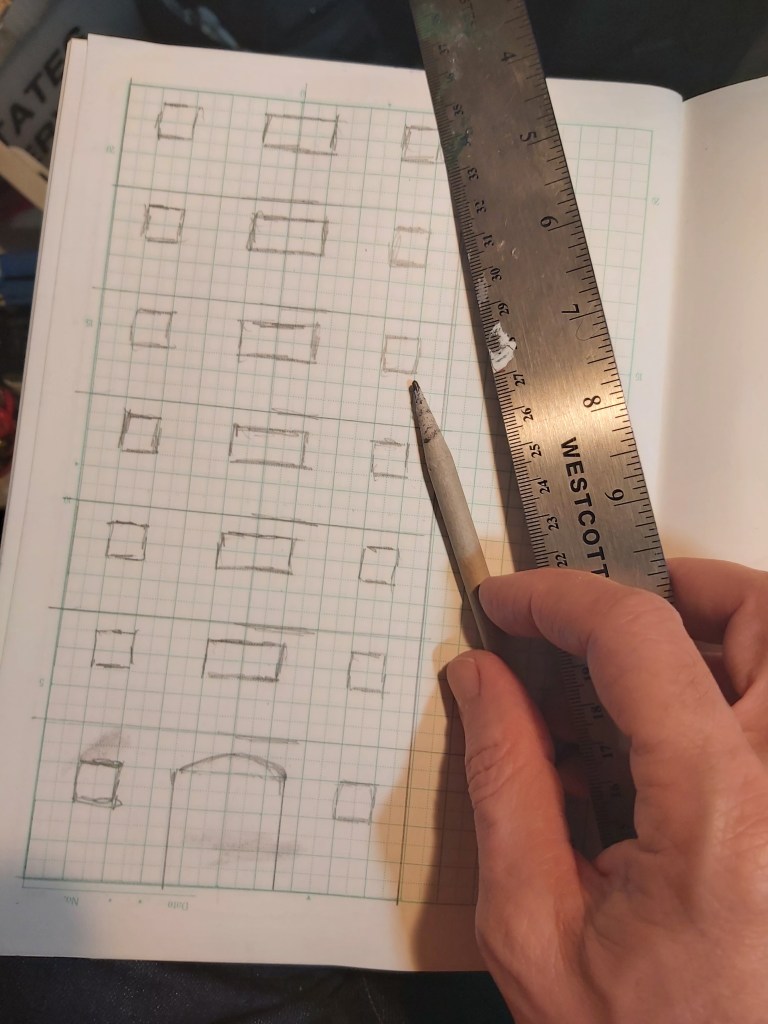
Take photos, then do some sketches. Printing photos will help with scale and proportion.
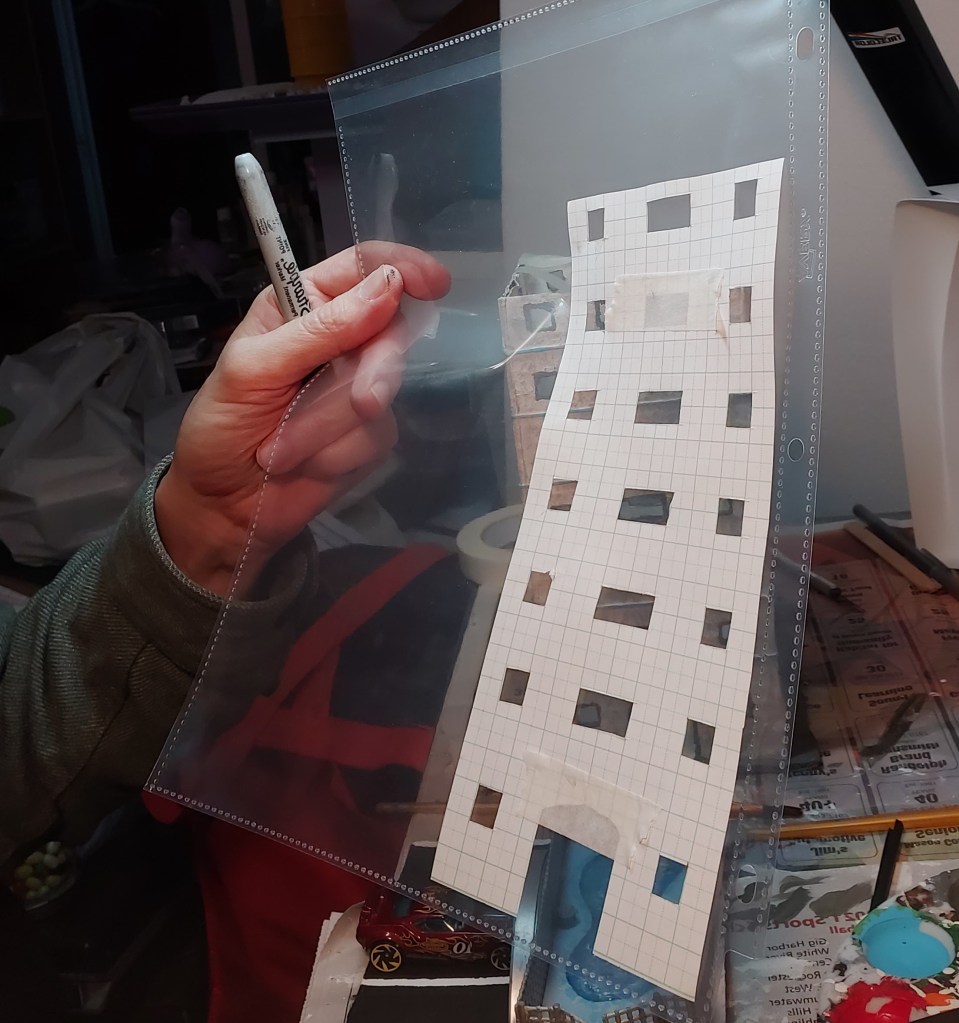
I like 1/4″-grid graph paper to help figure out what my measurements will need to be.
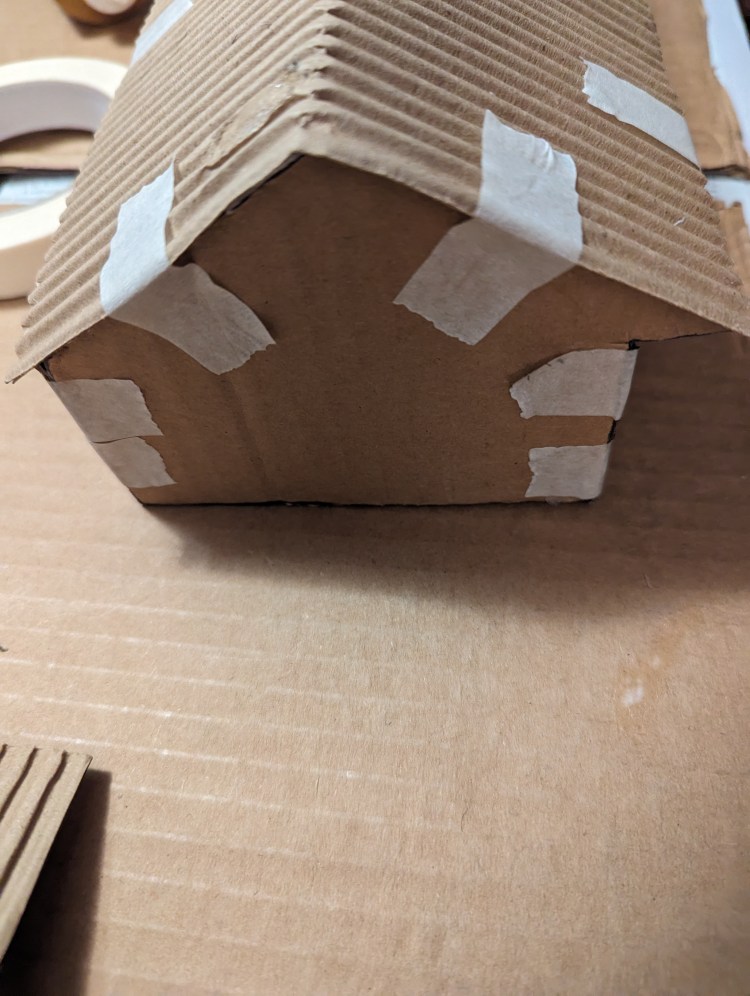
Corrugated cardboard is sturdier than thin card. Measure, then mark and cut with a good pair of craft scissors. White glue is fine. Use an old brush to paint glue – it will give you more control.
Masking tape holds pieces in place while glue dries. Once it’s dry, peel it off everywhere where it’s visible.
1. Photograph & plan
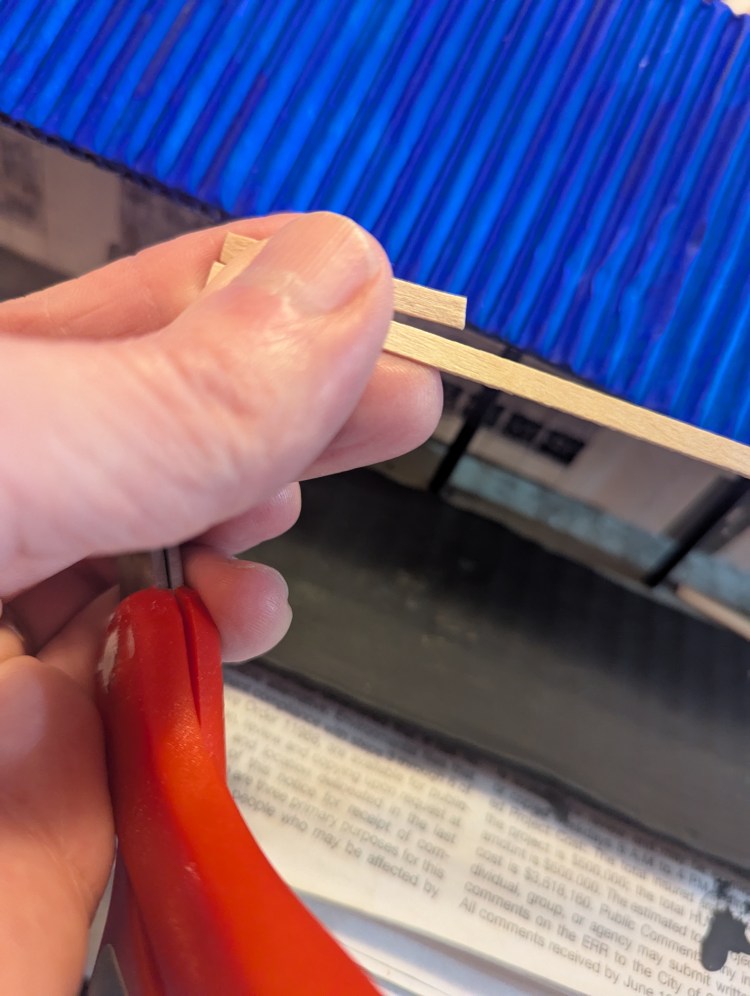
Photograph the building from all sides. Print b/w copies to study. Trace a basic outline on graph paper for proportions and measurements. A corrugated base piece 17” long x at least 8” deep will allow for parking places for Hot Wheels cars. The Nifty Thrifty building scales to 15” long x 5” deep including a 1” inset porch, and 4” tall at the top peak and bottom of the roof at the 2” mark. You’ll need three identical side panels 5” wide at the bottom of the roof (the middle one for support). Corrugated cardboard can be peeled away for a tile or metal roof look, be sure the wave direction matches, you’ll need one piece that’s 6” wide x 15” long (fold it carefully in the middle). Use smaller cardboard pieces for windows and bamboo sticks for porch poles. Cut, test-fit and glue it all together.
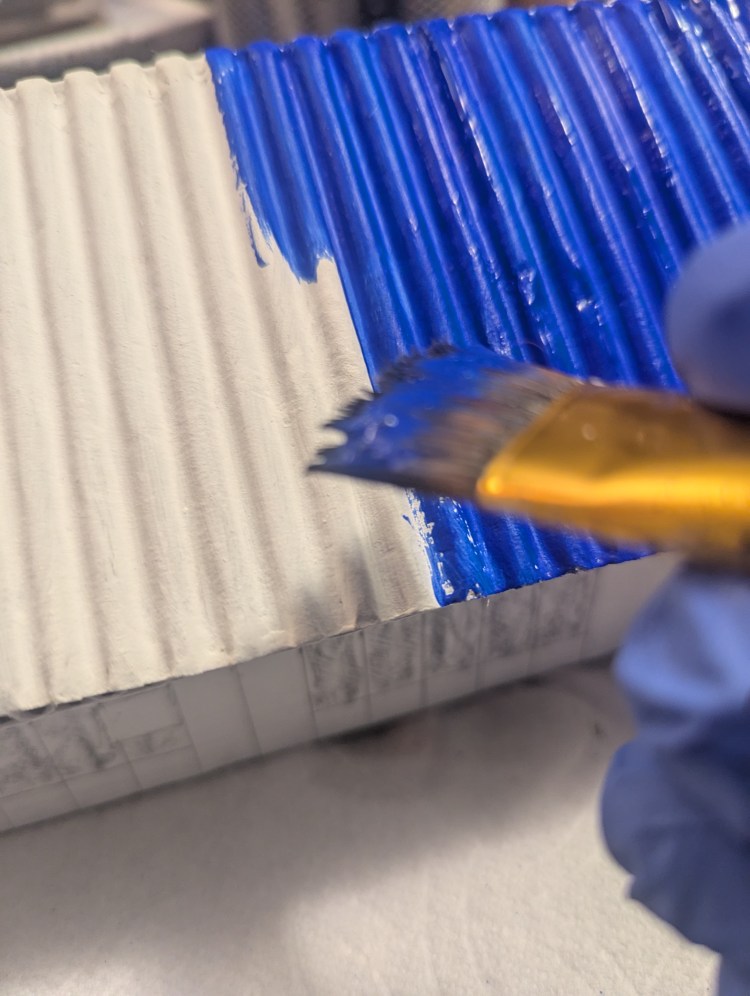
A white basecoat helps color pop. Although the actual metal roof color is more of a dull blue, bright colors stand out a bit better. Decide how realistic you want to go in matching (or not matching) colors.
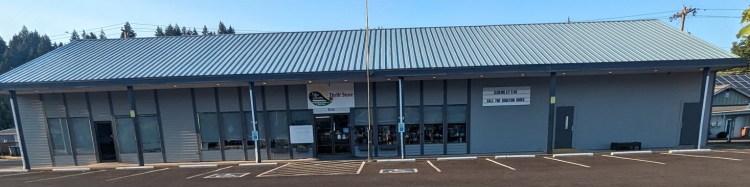
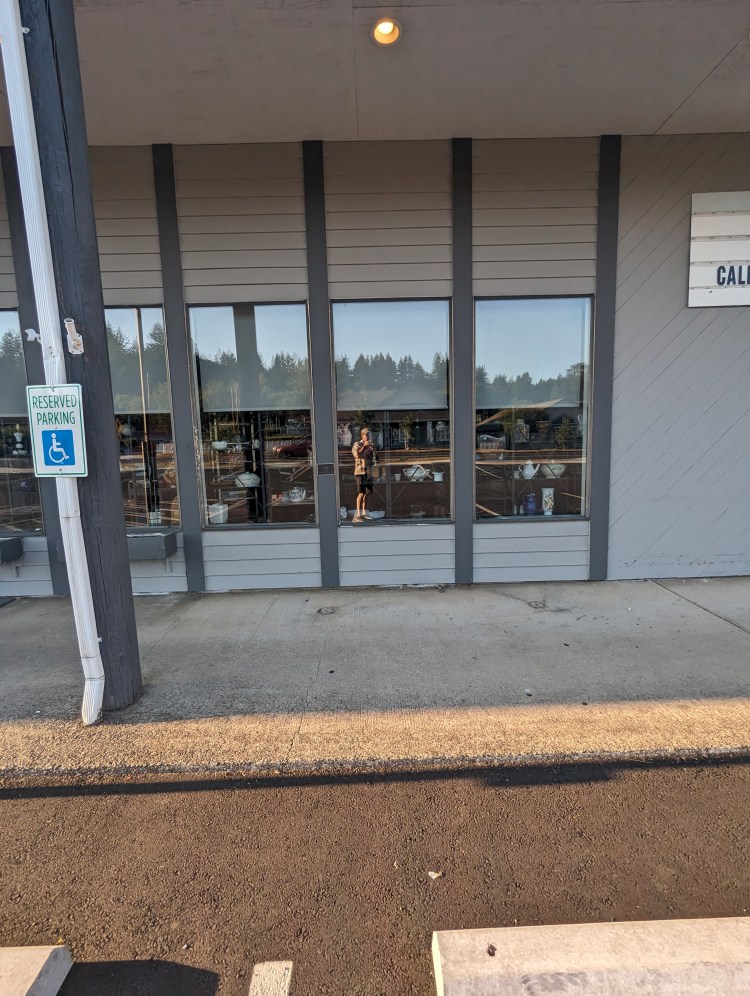
Reference photo of front including parking lot and streets
Reference photo of front
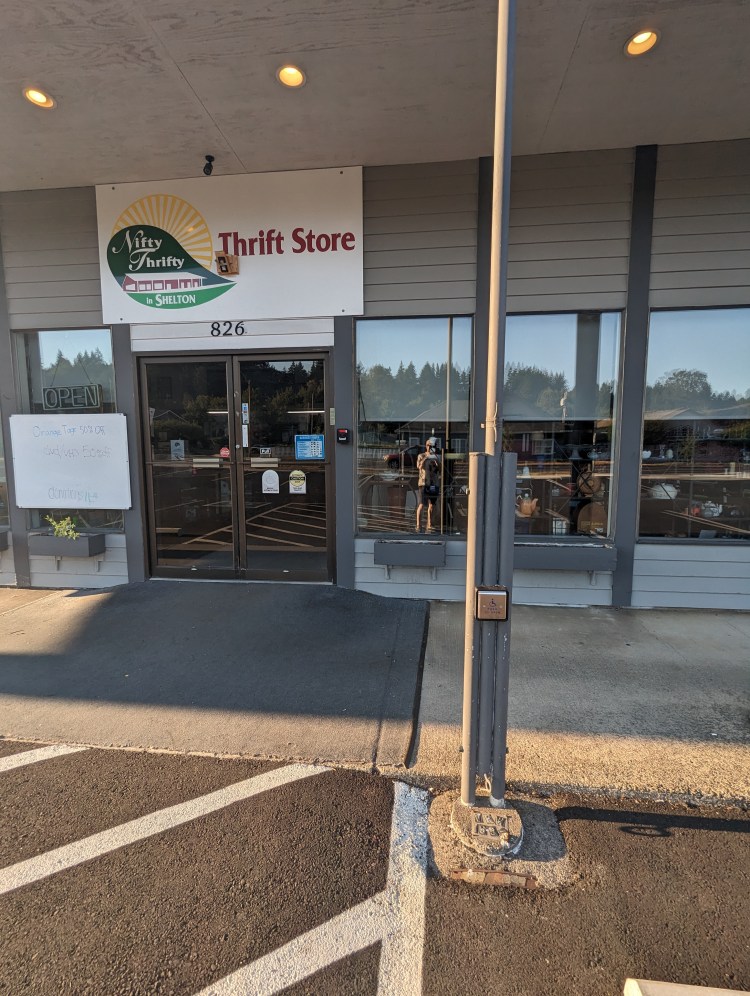
Reference photo of windows and front
Reference photo of door and sign
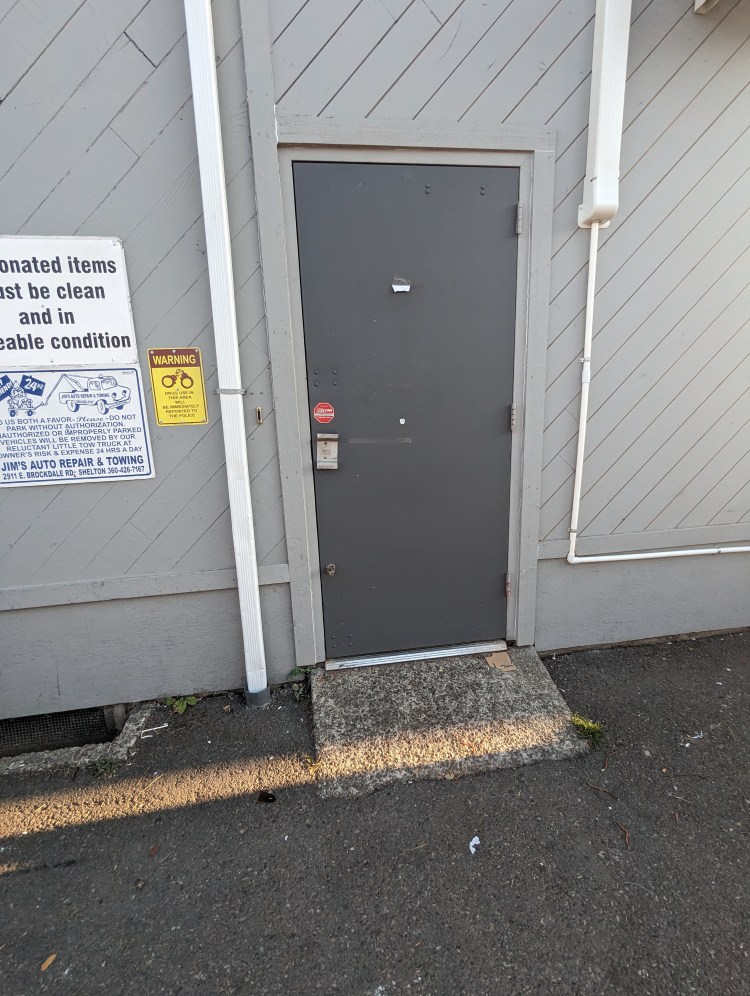
Reference photo of back door
Reference photo of back of building
Reference photo of sign of windows
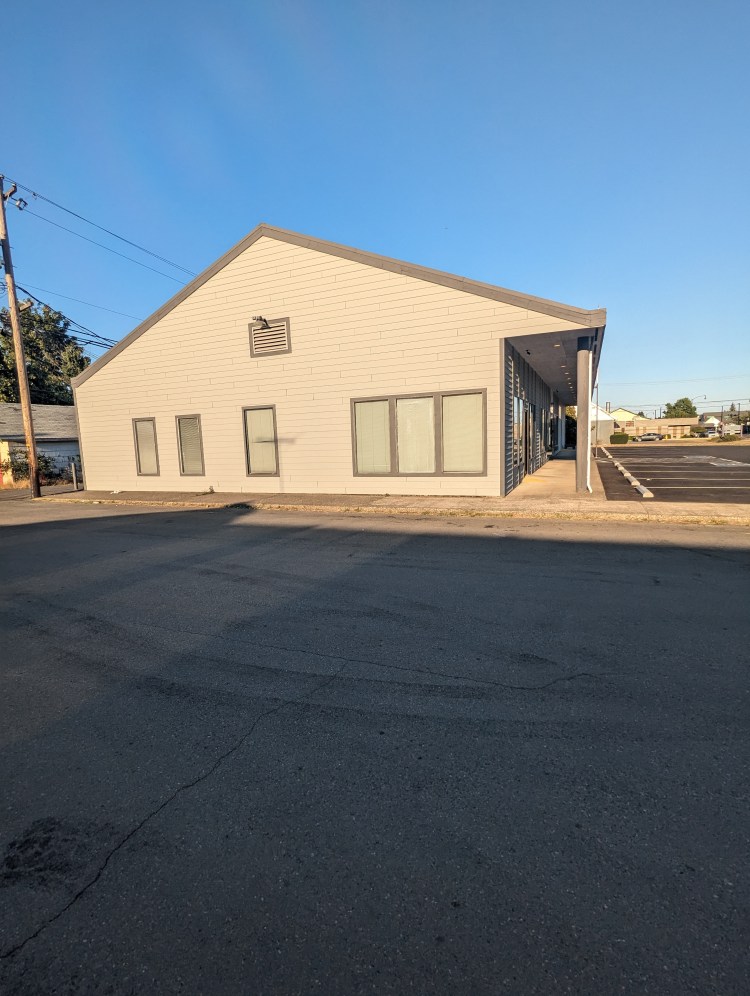
Reference photo of left side
Reference photo of right side
Reference photo of right rear corner with alley
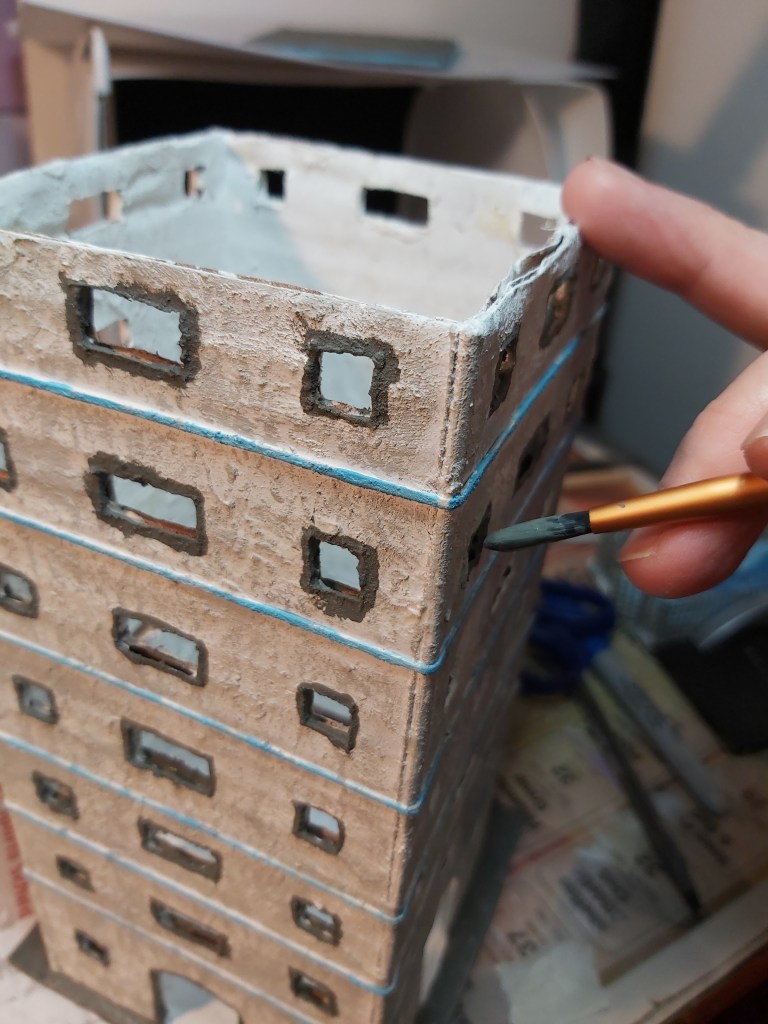
2. Paint
Use masking tape and/or glue with baking soda to tidy up any gaps. Once it’s dry, basecoat everything in white acrylic (water soluble) paint. Once that’s dry, paint the parking lot and porch poles black, the concrete sidewalks gray, and the roof blue. Leave the building white. While the paint dries, study your reference photos.
Paint markers are great for freehand detail.
To see the reference photo gallery, see step 2.
3. Building details
Use pencil and acrylic paint markers to match the basic shapes and colors of the windows, doors and signs. Measure, mark, cut and glue clear plastic over the top so the windows and glass doors will reflect realistically.
Use masking tape to control where the black asphalt, gray concrete and white curb paint will be.
Toothpicks or square craft sticks make great curb stops.
Peeling off masking tape. I painted the gray sidewalks first, then masked it before painting the black asphalt
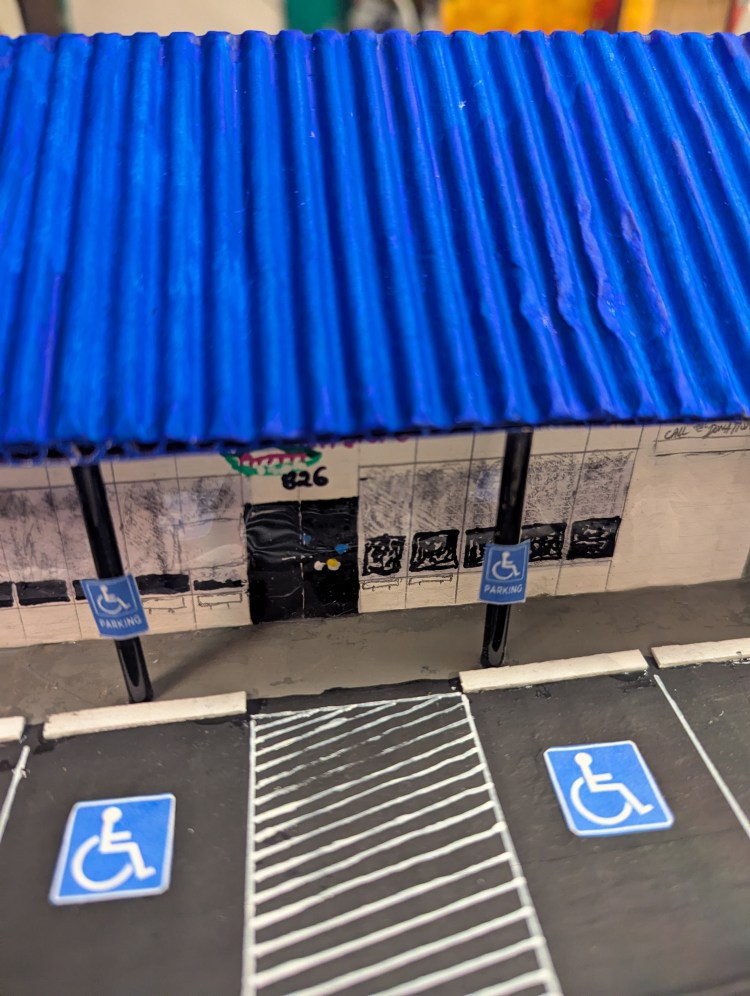
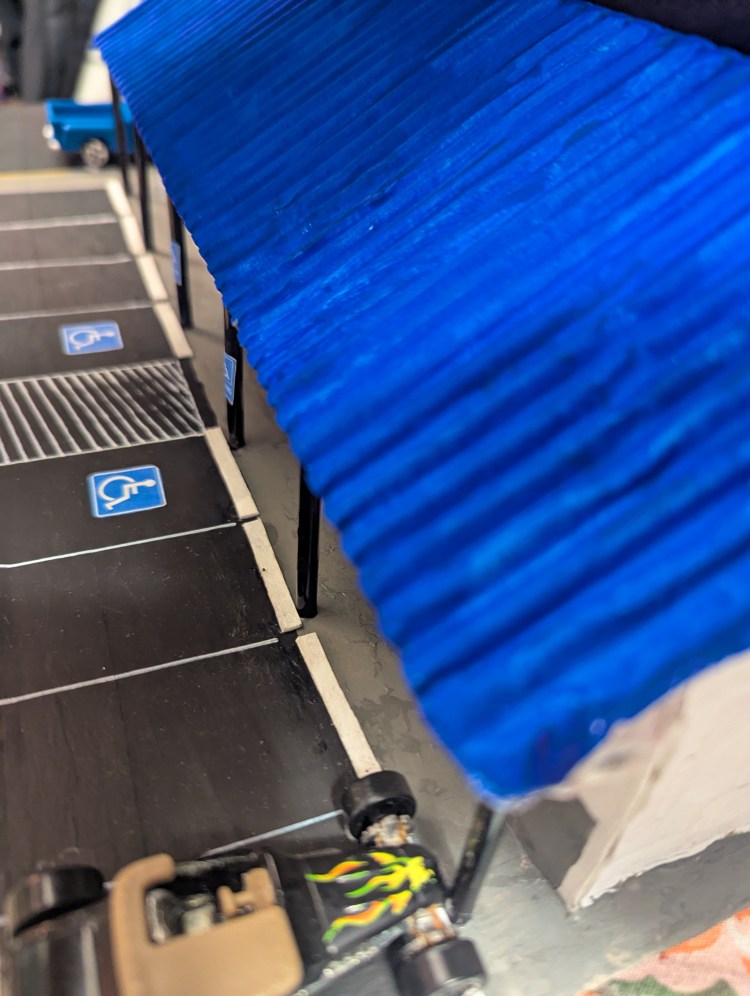
Parking lot stripes. I used a white paint marker and a ruler.
Handicap parking indicators. I used a computer and a color printer, then trimmed them out with scissors and glued them in place.
4. Parking lot
Use a ruler and a white acrylic paint marker to paint parking lot stripes and street parking indicators. Use a color printer and print handicapped parking signs in sizes to match the reference photo, and then glue them to the parking lot and the porch poles. Test fit Hot Wheels cars to park in a few spots, then apply glue to the wheels with a brush and glue wheels to pavement.
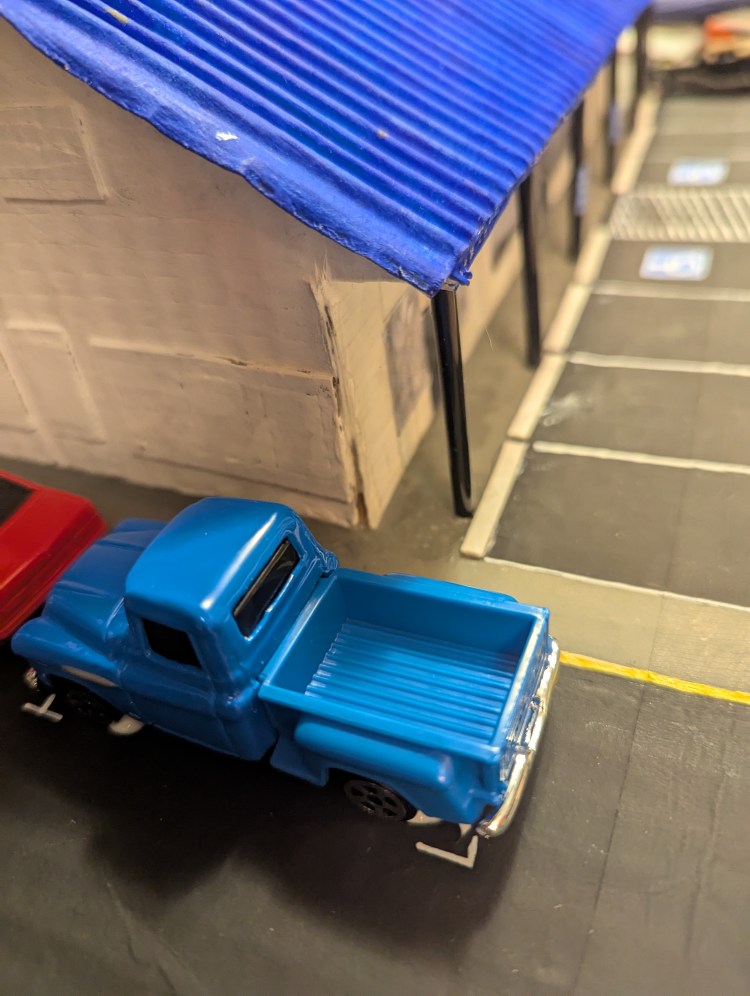
Nifty Thrifty, left side of building. Hot Wheels tires are glued to the street to keep them in place.
Left front corner view. Note the yellow curb stripe. Paint markers and a ruler work great.
Right front corner view. Note the hotrod Hot Wheels car at far right, which was purchased at Nifty Thrifty for 50¢.
Front view. Door and window detail, and the sign were drawn in pencil and painted using paint markers. Then, clear plastic was glued over the top for the glass look of the windows and glass doors.
Rear view. Pencil, paint and acrylic paint markers. Air units on the roof are plastic cubes which were painted white.
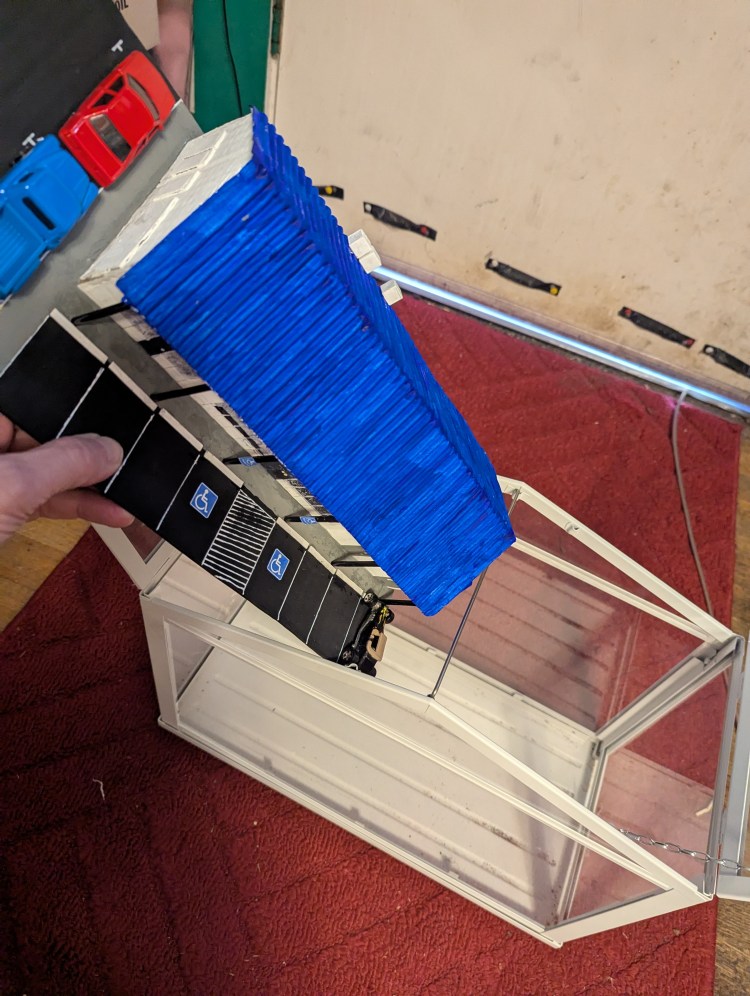
The entire model was carefully pre-measured to fit in this glass display case.. Plastic cubes were painted and glued to the bottom of the model, and glued under its base to elevate it just above the lowest metal ridge of the display case, for better visibility.
In it goes, a perfect fit.
Rear right corner view of Crafty Time with Dave’s Nifty Thrifty model, in the case, in the care on the way to Nifty Thrifty in Shelton WA.
Dave Pierik, artist (3rd from left) with Nifty Thrifty Staff Melanie, Melissa and Michelle. Thank you Nifty Thrifty and Mason County Senior Activities Association for your support!!
5. Nifty model at Nifty Thrifty
The entire Nifty model fits neatly in a glass terrarium that was donated to me by Nifty Thrifty. It’s on display there, behind the counter on a shelf at 826 W. Railroad Avenue in downtown Shelton.
6-26-2025 Shelton-Mason County Journal pg. 23 Crafty Time Nifty Thrifty model by Dave Pierik, as it appeared in the newspaper.
Want to build this, or something like it? Here’s a sheet of handicapped parking symbols you might find helpful. It’s a Word file. You might need to print it in different sizes. Color looks best.
What fresh ideas would you like to see next in Crafty Time? Visit www.craftytimewithdave.com for more photos and project ideas. Please email your photos and feedback to dave@masoncounty.com or call (360) 426-4412. Visit the Shelton-Mason County Journal office on 3rd & Cota to see the display anytime!
Materials: Cardboard, white glue, flat toothpick, milk pull, paint.
Difficulty: moderate
Cost: less than $1 including paint and glue Time: three to five hours or more of fun!
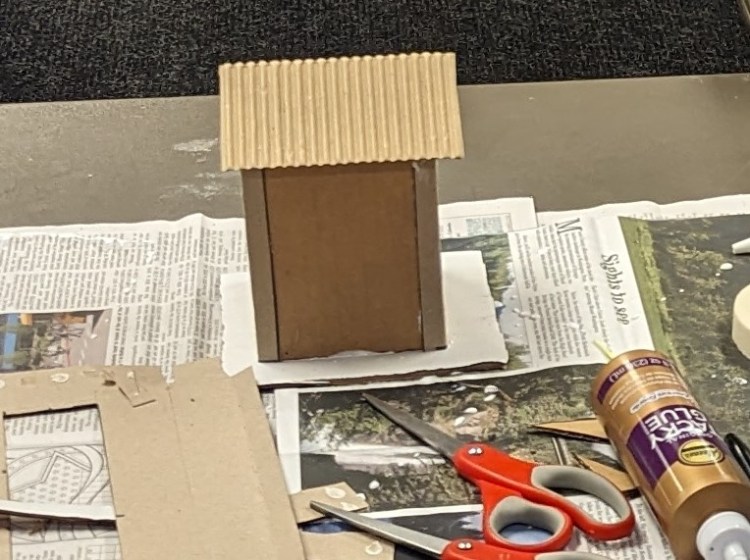
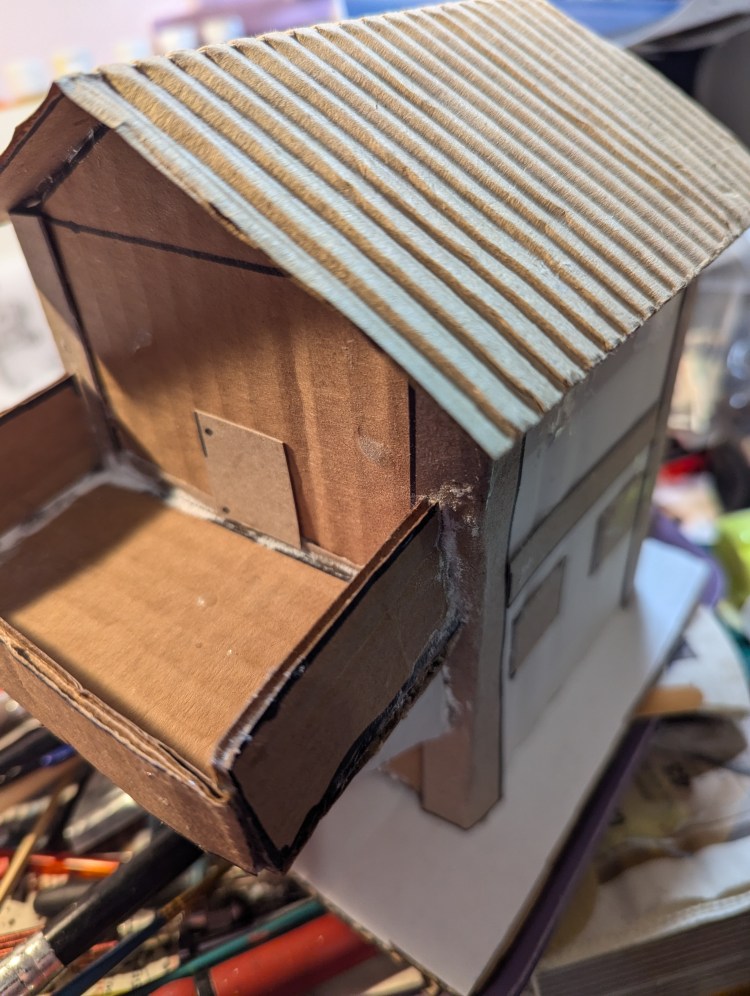
1. Measure, mark, cut & glue structure
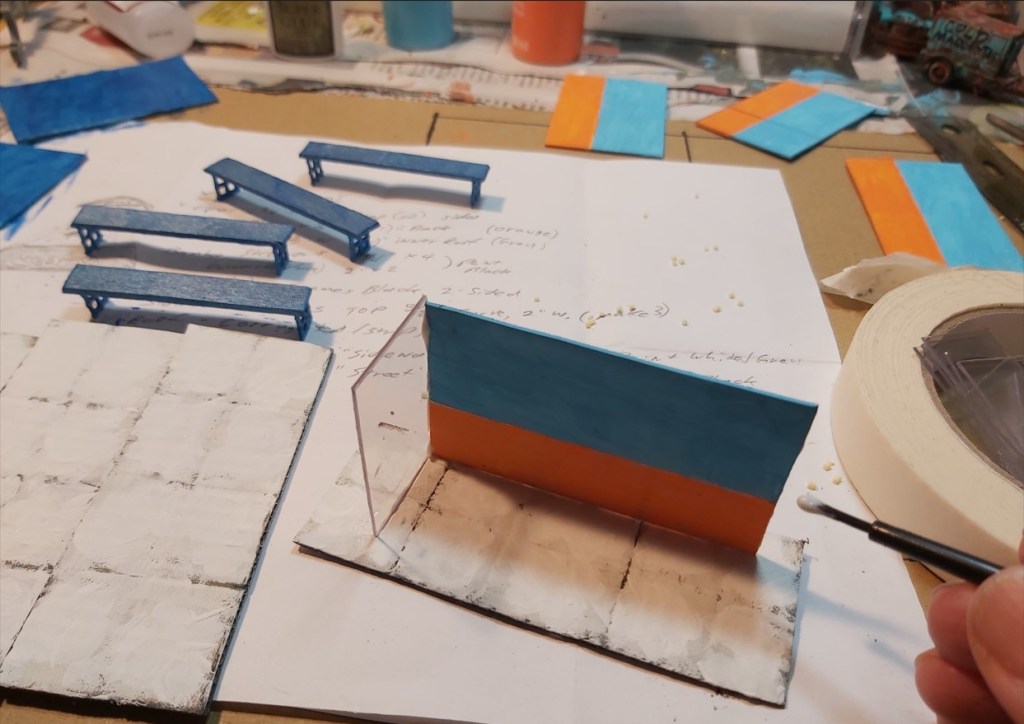
Measure and mark cardboard. Base: 5” square. Walls: two are 4” square, two are 4” x 4” to 5” peaks at center. Cut and glue together at edges, leaving ½” of extra space at base for the sidewalk. Use masking tape to hold in place until dry. The roof is 5” wide x 6”, and folded in half. Optionally, (shown) the top layer of corrugated cardboard can be peeled away for a tile or metal roof look.
2. Balcony and bits
Corners, windows & doors: cut thin cardboard into ½” strips and fold in half for the corner trims, and ¼” strips along the horizontal floor divider line. Cut ½” squares for windows. Use a glue brush for better control. Balcony: cut a 2” cardboard square diagonally for the balcony support triangles, a 2” x 4” rectangle for the floor and two 1” x 2” and one 1” x 4” piece for the balcony walls. Glue on, above the front door.
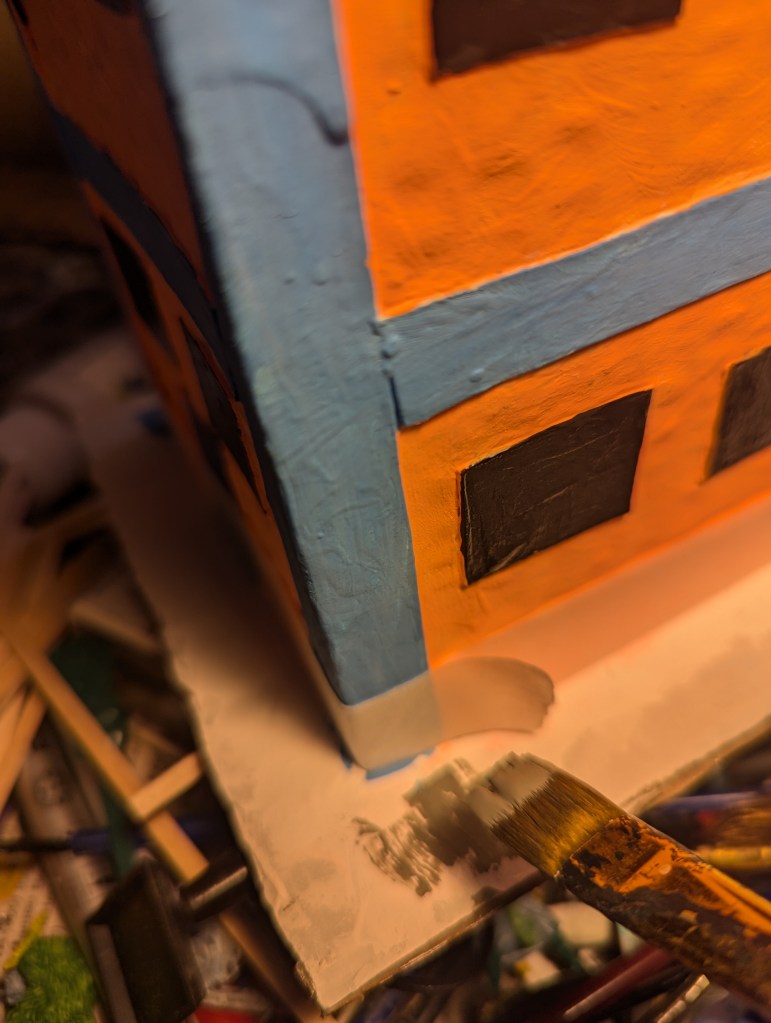
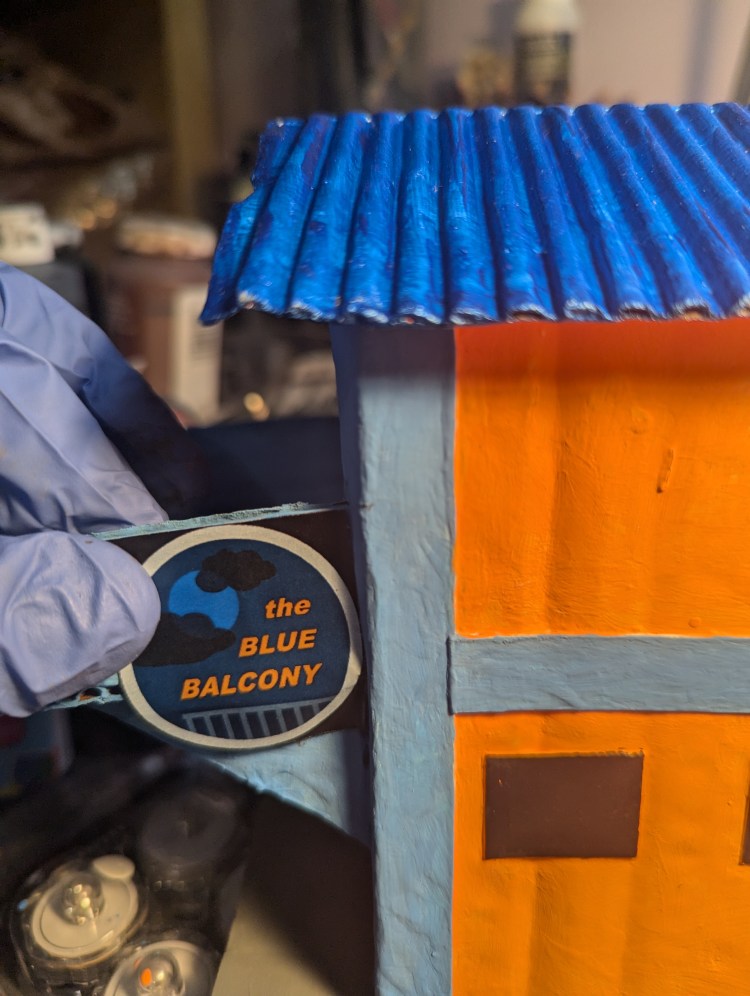
3. Paint
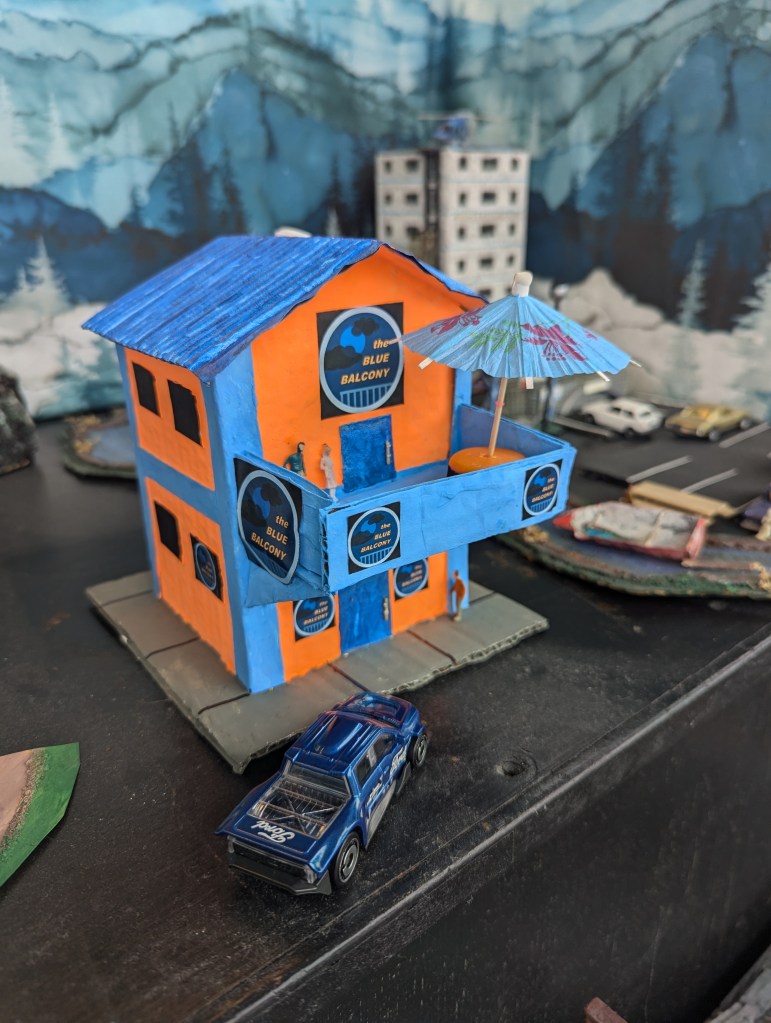
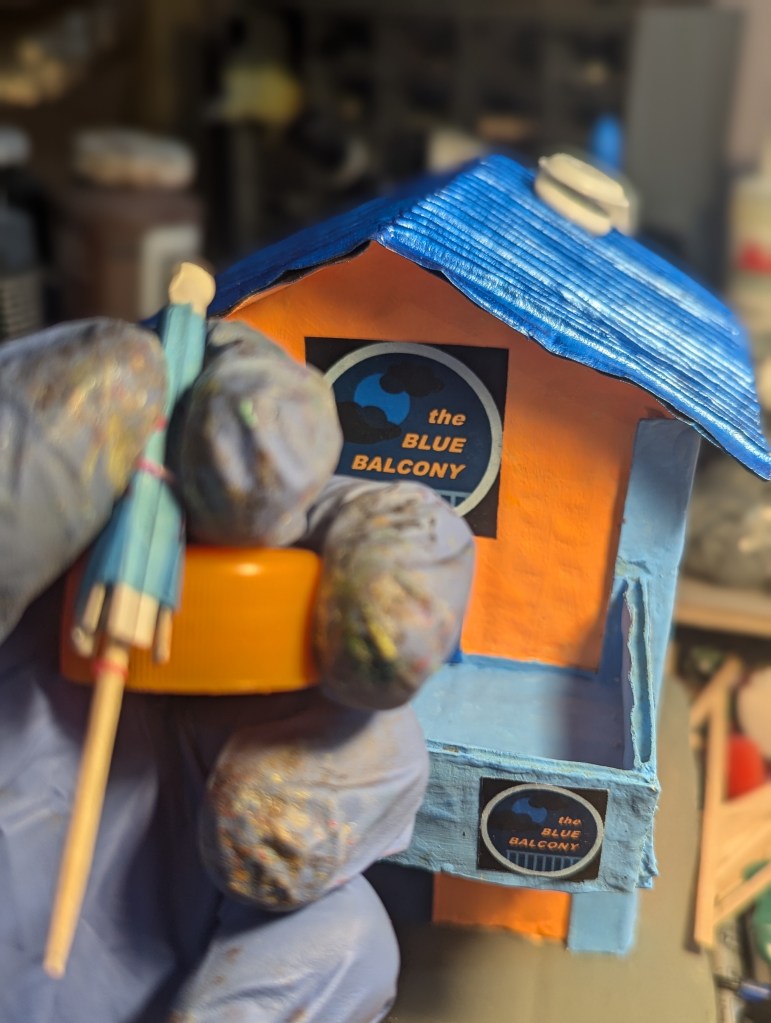
Prime/base coat everything in white, then paint it any colors you like. Neon orange contrasts with the blues to get them to pop. The roof and doors are metallic blue. The windows are glossy black and the balcony and trim are neon blue. Sidewalks are gray. Use painter’s tape for cleaner edges. Paint 2-3 coats, including touch ups.
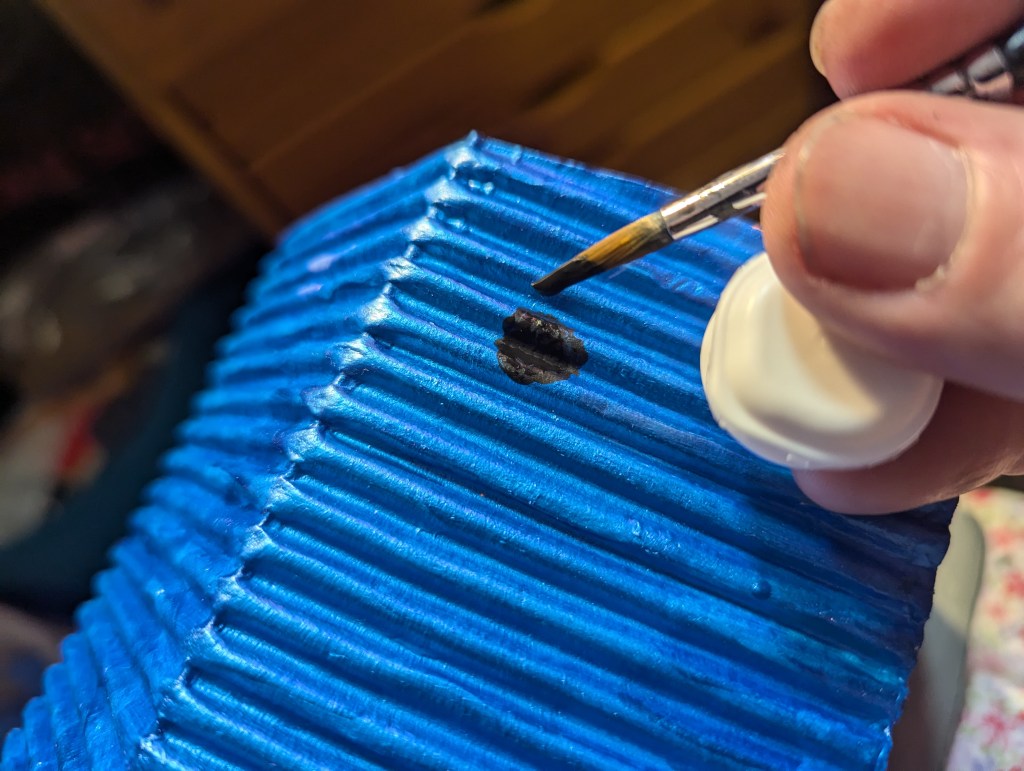
4. Details
Cut flat toothpicks or plastic canvas down for door handles, paint bronze. Use a milk pull for the roof vent, leave white. If you have access to a printer or even a color printer, you can create some paper signs. An orange bottle cap, a cocktail umbrella and some figures add pop.
5. The Blue Balcony
Happy Tree City now has a restaurant & nightclub, the Blue Balcony. Now playing: Live blues & jazz. Add your choice of cars and figures, and the stories you can imagine almost write themselves!
What fresh ideas would you like to see next in Crafty Time? Visit www.craftytimewithdave.com for more photos and project ideas. Please email your photos and feedback to dave@masoncounty.com or call 360-426-4412. Visit our office to see the display!
Art quilting is a fun craft that can grow into a satisfying hobby. Here’s a quick how-to!
Materials: paper, fabric scraps, fusible webbing (&/or glue sticks, optional). Tools: pencil & colored pencils, fabric scissors, iron & nonstick mat, sewing machine (or can hand-stitch). Materials cost: $20 to $100 or more depending on your access to fabric scraps. Time: five or more hours of “painting” with fabric.
Plan it out. Look at images, anything you like. Choose one idea. Play with sketching it out on blank or graph paper to grid out where colors will go. Pick out fabric scraps of various colors, I like batiks but it all works. A base piece of 14” square fabric makes a good background, your blank canvas for “painting” with fabric.
2. Set it up – Lay out your fabric palette for what you’ll need. Pre-cut small to medium chunks of fusible webbing and match to the colored fabric scraps for amounts of each color. Iron the webbing to the backs of each. Grab your pencil and trace the bits you want onto the paper portion of the webbing.
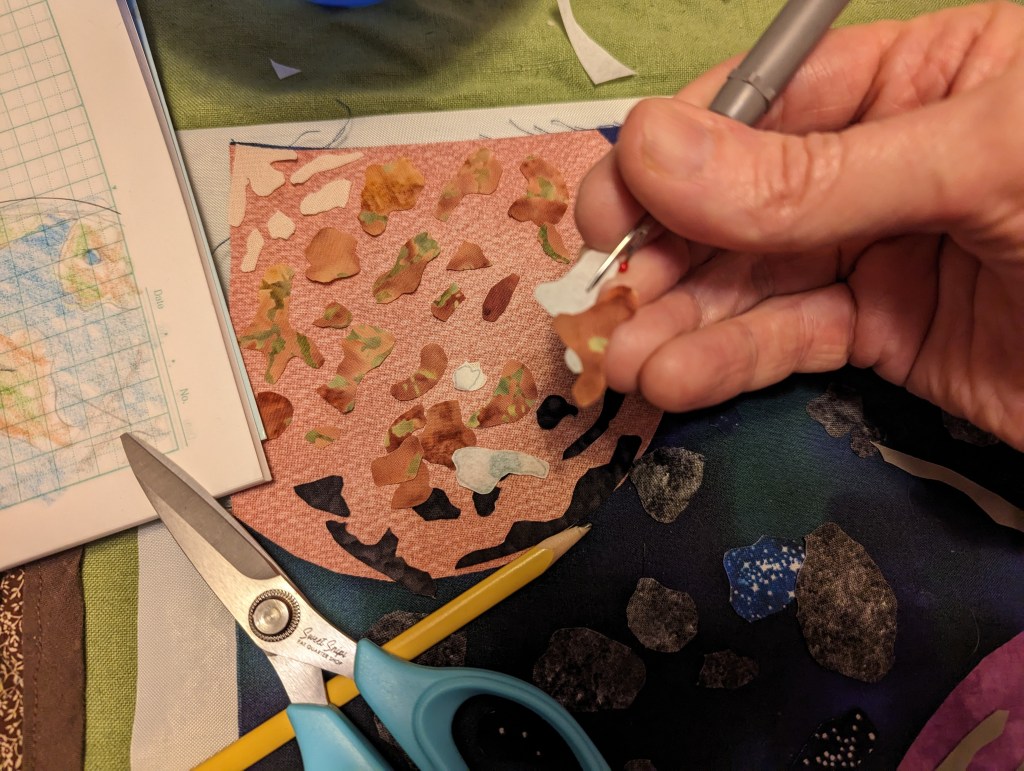
3. Cut & place – Use your fabric scissors to “fussy cut” along your pencil lines, leaving the paper of the fusible attached. Test-fit on your background, like puzzle pieces. Leaving background showing or overlapping pieces is fine. When you like where things are placed, peel off the paper and iron them down to glue in place.
4. Iron down – Fusible webbing will hold your design in place. Later, stitching everything down with batting will add thickness and dimension. It’s art, so anything goes. Hand-stitch shiny buttons or beads for even more “pop” if you like.
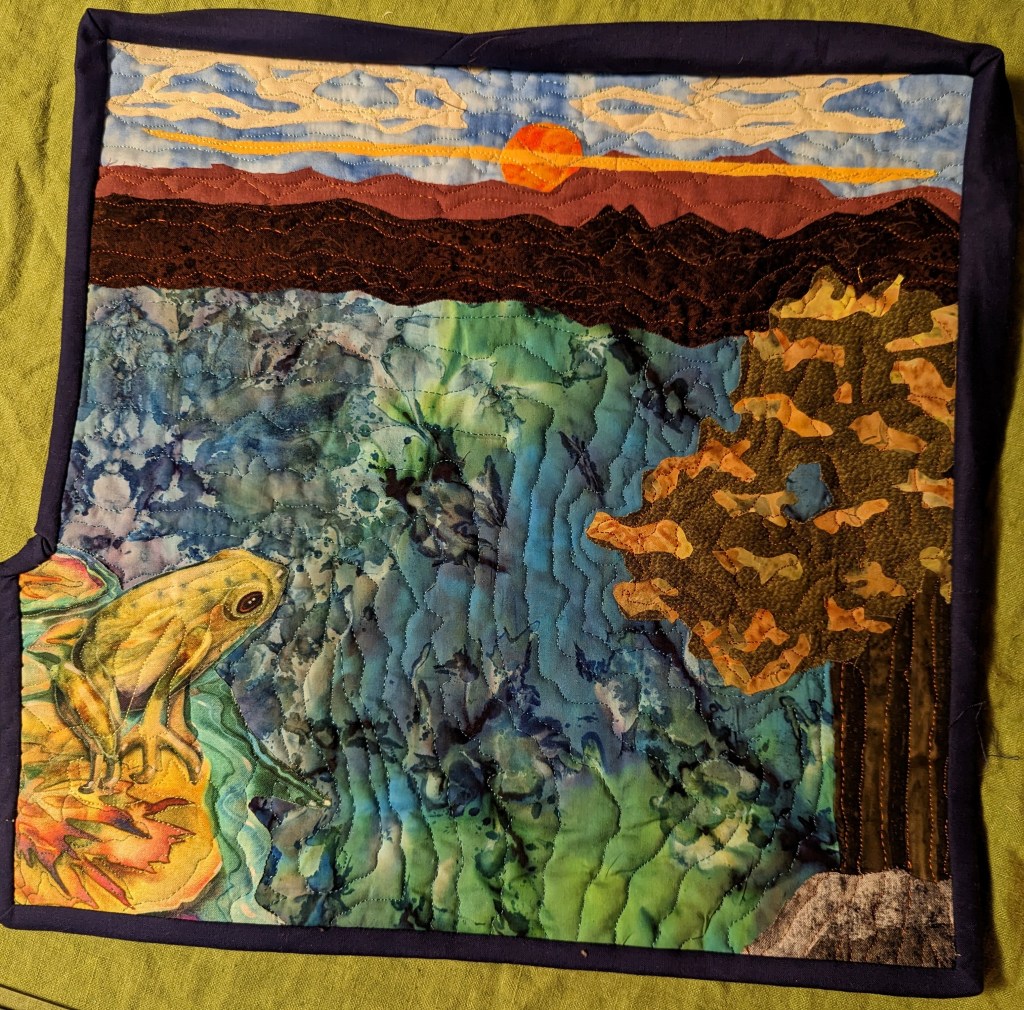
5. Art quilt example – This frog, tree and sunset landscape is my first art quilt, finished recently. Subject matter is up to you. Landscapes are popular, but you can create a space scene, a portrait, or something abstract; anything! Think of it as painting with fabric.
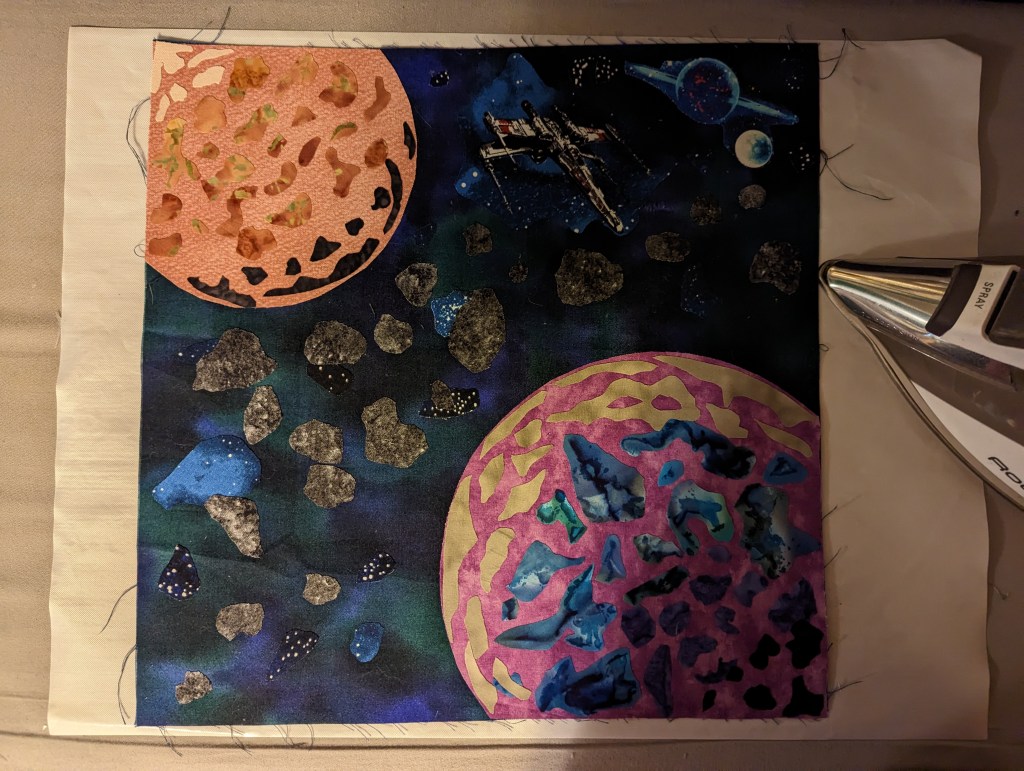
Bonus images – part of a triptych of outer space images I’m working on for a future wall hanging.
Special thanks to my wife, and to Jason Cromwell (who taught me how to do this), and also to Annie’s Quilt Shoppe.
See the display in at 3rd & Cota St. in Shelton, WA or visit www.craftytimewithdave.com for more crafty ideas to try at home!
1. Roll newspaper logs. First, cut a stack of pages, about 1/8 of the way up from the bottom. Roll from the bottom up, run a stripe of glue along the top of each one as you go. After doing a couple of these it gets fast and easy. This cabin base is 4” square, inside of a 5” square of corrugated cardboard.
2. Assemble base. Measure an area and cut logs to size as you go, alternating the overlap at the corners and gluing each with a stripe of glue.
3. Assemble top. Start with a folded piece of thin cardboard from a food container, approx. 8” x 5” and fold the 8” side in half. Carefully cut and glue newspaper logs in place. Glue base and top together. Let dry.
4. Newspaper shingles. Cut 5/8” along the right edge of a several pages, and then cut shingles with the textured portion facing down. Glue on, working from bottom to top.
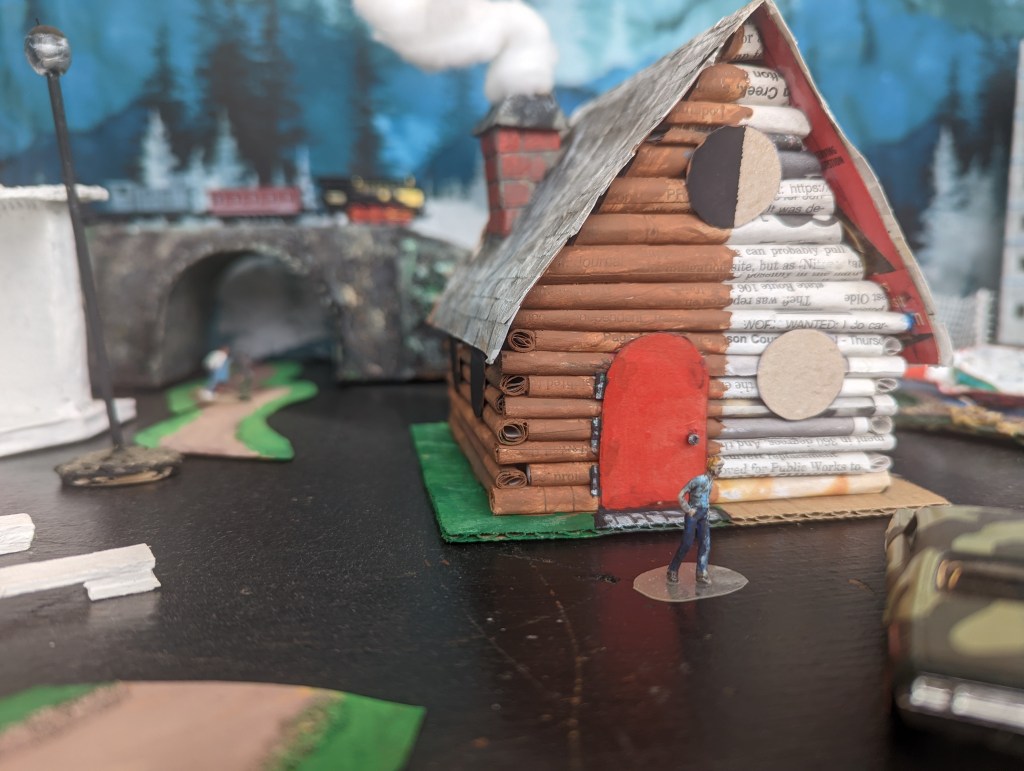
5. Cabin. Add a cardboard chimney and a cotton ball for smoke, and paint it if you like. This cabin fits right in to our Happy Tree Village display!
See the display in at 3rd & Cota St. in Shelton, WA or visit www.craftytimewithdave.com for more crafty ideas to try at home!
Bonus tips and photos:
Bonus photo – detail and paint: A few newspaper logs help to stabilize the cardboard for the chimney. Paint big areas first, and then go back for touch-ups on the second coat.
Bonus tip – bricks: If you cut up a colorful food box, you’ll have colorful bricks. Be sure to alternate their widths for the chimney, then glue them on to a pre-measured piece of cardboard.
Bonus tip – door knob & hinges: Cut a tiny slice of the stick from a Q-tip to create a doorknob to glue on. You can use cardboard or three wider slices for door hinges.
Bonus tip – mortar: Paint chimney mortar grey, right over the top of the bricks, before you paint the bricks red.
Bonus tip – window rounds: Use a coin to trace round shapes on cardboard, and then cut them out.
It’s a good idea to make a quick sketch of what you want to create, first.
1. Plan, measure, mark and cut. This bus is about 2” long, so each bus stop will need two clear sides 1 ¾” H x 1 ¼” deep, a back 1 ¾” H x 2” wide, a sidewalk base 3” wide x 2” deep and a roof 2” wide x 2” deep. Keep the fronts open to allow access for figures.
Holding parts for basecoats can get messy. Rubber gloves keep paint off your your fingers.
2. Pre-paint. Avoid getting paint on the clear pieces. Paint the sidewalk gray and white, the back in colors to match your buses and the roof. Use masking tape to paint straight lines. Paint a second coat also.
Using a brush for glue gives wonderful control. You might want to use disposable brushes, however.
3. Assemble. Once paint is dry, assemble by brushing glue along the edges. For benches, cut craft sticks or cardboard to 1 ½” long x ¼” wide, glue legs on and let dry, then paint the same color as the roof. Once dry, paint glue under leg edges and place carefully.
You don’t need to model every detail, just pick out a few highlights and focus on them.
4. Add details such garbage cans, newspaper racks, vending machines, shrubs and sculptures about 1/2”. Shown: color printouts are glued to material painted to match.
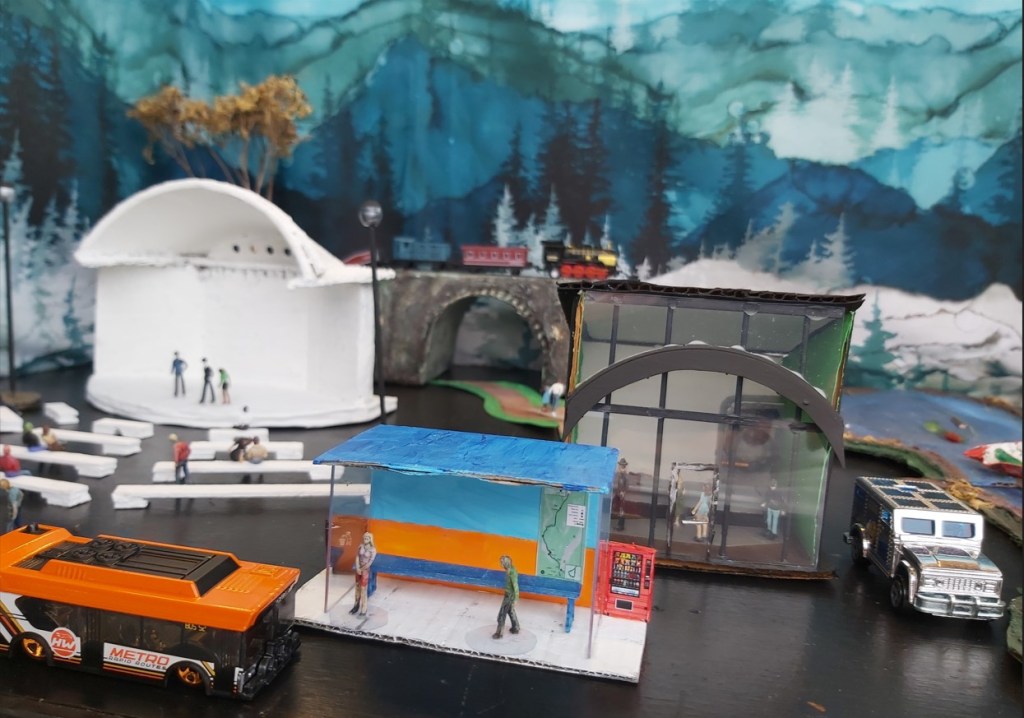
These bus stops integrate well with other buildings, figures and vehicles.
5. Enjoy! The Happy Tree Transit system now covers many destinations, with bus stops all over town!
See the display in at 3rd & Cota St. in Shelton, WA or visit www.craftytimewithdave.com for more crafty ideas to try at home!
Cost: about $1 including paint and glue Time: two to five hours (can vary)
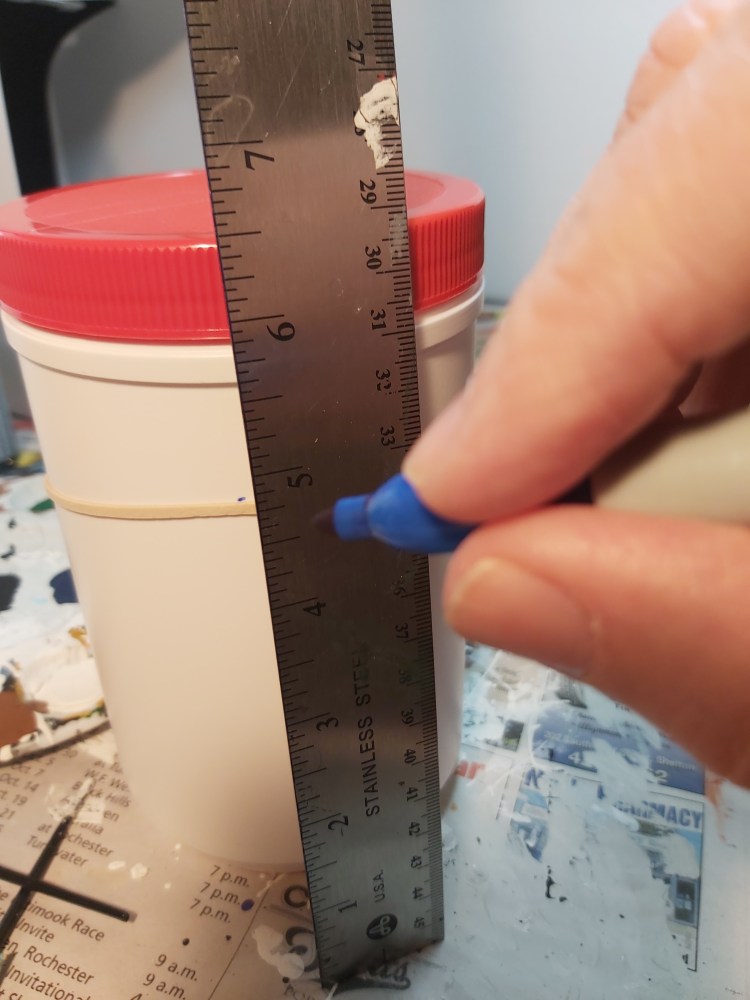
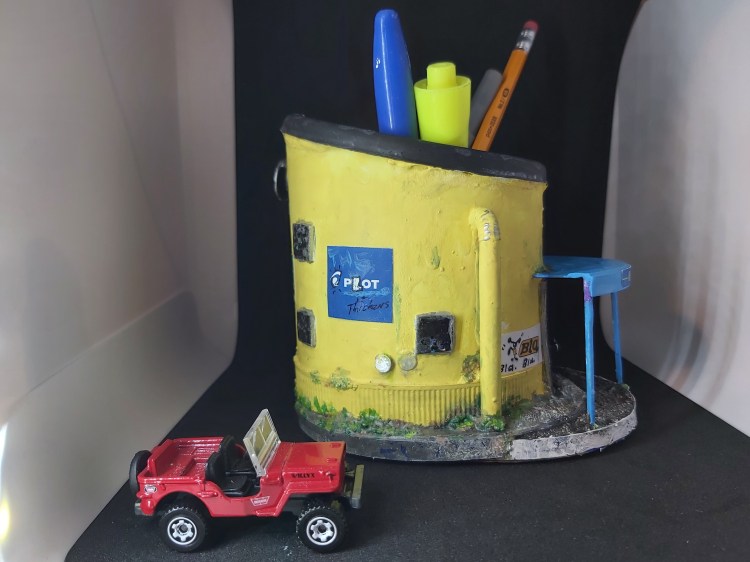
1. Measure
Measure and mark a flat-bottomed plastic container using a rubber band, a ruler and a permanent marker. The low side will be 3.75” tall and the taller end will be 4 ½” tall. Carefully cut along the line.
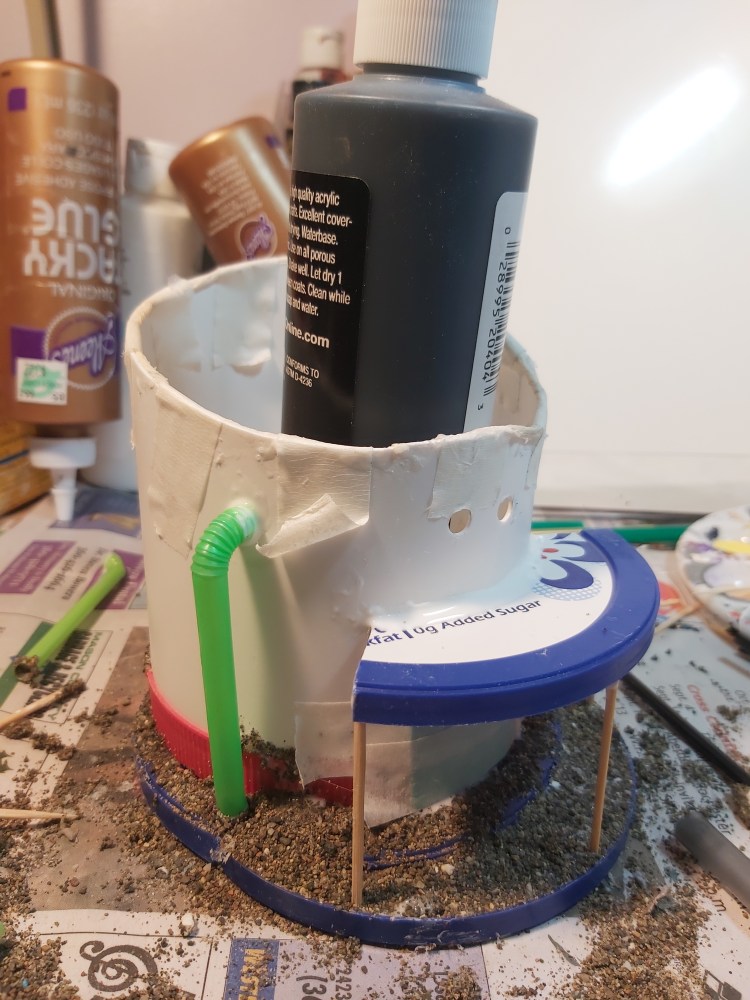
2. Assemble
\Plastic lids with glue and sand form the base. The bendy straw will be a downspout. Cut down another plastic lid and support it with toothpicks for the awning. Glue everything together and add masking tape to hold it all in place. Set aside a full day to dry, then remove masking tape.
3. Prime
Examine the structure and make any changes now, for example adding the top portion of another container to the top. Mix white glue with white paint. Paint the entire structure, inside and out. Including the glue with the paint will help strengthen it.
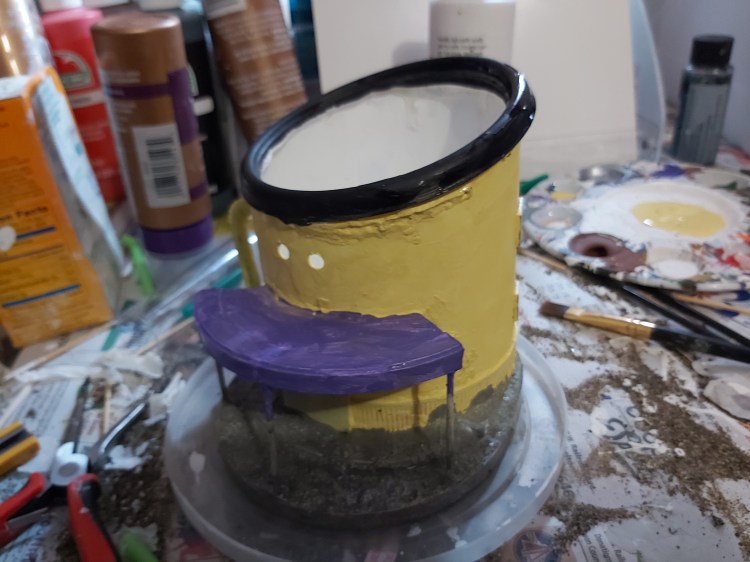
4. Basecoat
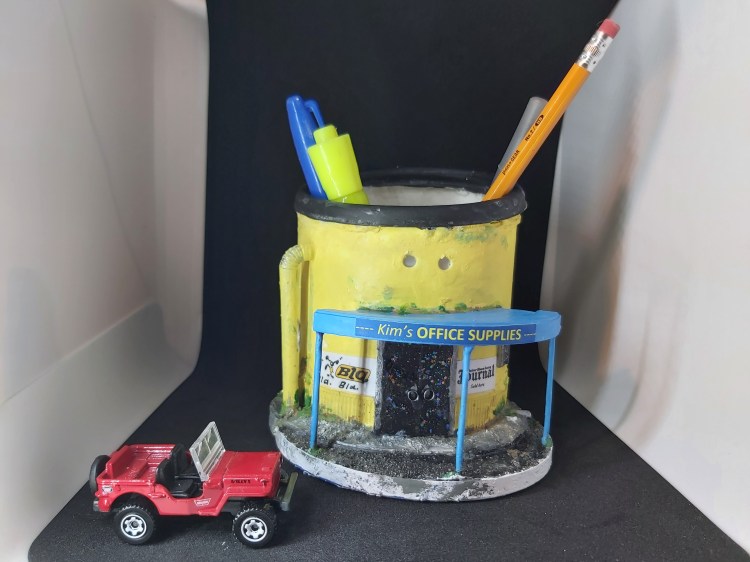
Paint the building yellow, the awning blue or purple, and the roof black. Use washes, grays and earth tones to bring out the high and low parts of the sand for the street &/or sidewalk. Add a second coat. For windows, base coat in black, then add metallic or glitter paint. Add details of your choice.
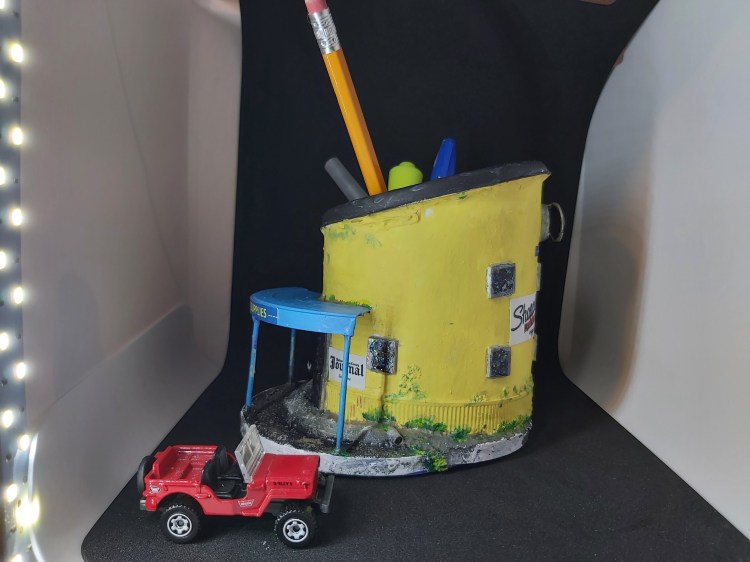
5. Office Supply
Imagine shopping here for your school supplies!
What fresh ideas would you like to see next in Crafty Time? Visit www.craftytimewithdave.com for more photos and project ideas. Please email your photos and feedback to dave@masoncounty.com or call 360-426-4412. Visit our office to see the display!
All ages how-to by Dave Pierik, Shelton-Mason County Journal
Let’s make a hotel
Happy Tree City is thriving with cars and people. A hotel is what we should scratch-build next!
Tools: ruler, pencil & markers, scissors, paintbrushes. Craft knife optional, use with care.
Materials: Cardboard, masking tape, school glue, paper sign designs, clear plastic sheets & tube, rubber bands, plastic canvas, clear packaging, toothpicks, bamboo skewers, craft foam sheet and acrylic paint.
1. Templates
Think of hotels you like, look at some photos and draw ideas. With a ruler, draw a template. From that, trace and cut cardboard. Make four walls.
2. Assemble
Glue together on a base (example is 5” square) and reinforce corners with bamboo skewers. Add masking tape until dry. Prime white.
3. Trim
Add rubber bands for floor divider trim detail. Glue them in place. Dry brush the exterior light gray, paint the trim light blue. Paint window frames dark gray.
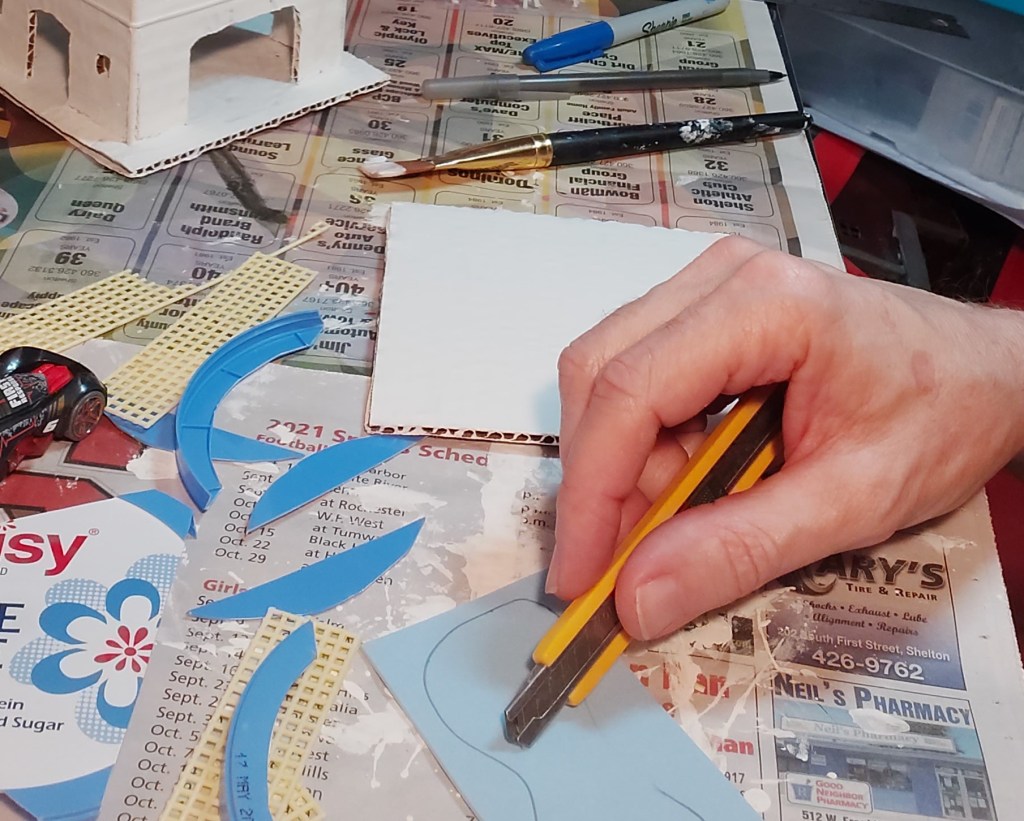
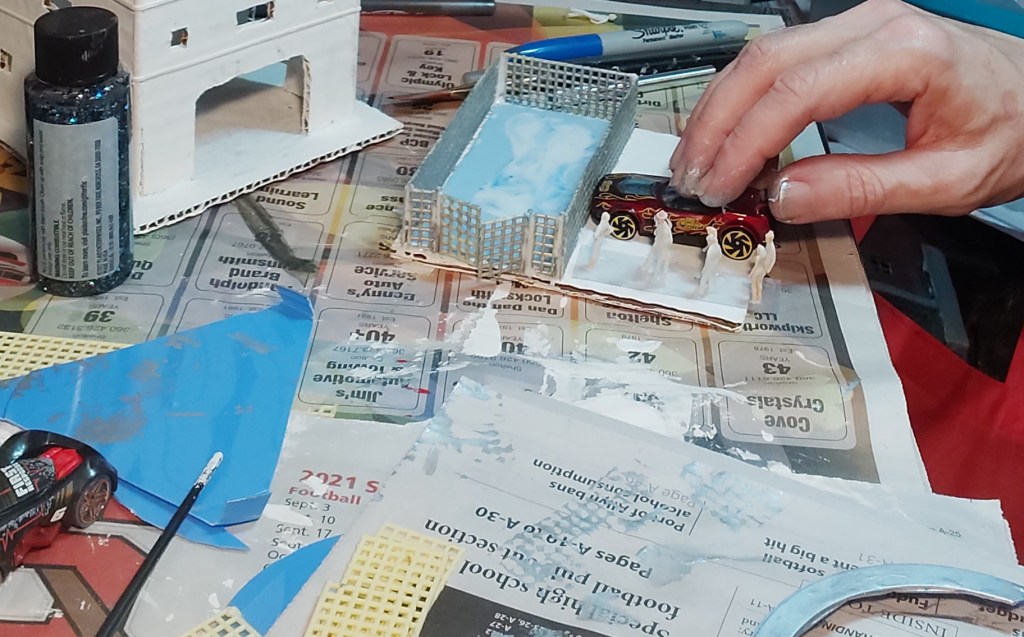
4. Pool
Paint a 5” square base of corrugated cardboard white and set aside. Cut craft foam to 4 ¼” x 2” then draw a kidney-shaped pool on it and cut carefully, glue to base.
5. Fence
Align, mark and cut plastic canvas for fencing, about 1” tall. Paint it silver, along with six toothpicks the same height. Test fit. Glue around the outside edge. Paint bottom of pool metallic blue. Pour school glue to top edge of pool for water.
6. Test Fit
Whatever cars or other figures you will be using need to be the right size and scale. Here, the parking space is not quite long enough, and had to be adjusted by gluing on a stack of two craft sticks.
7. Mask
Test fit your cars first.
Above: removing masking tape to reveal parking lot stripes. For this effect, cut 1” masking tape down to ¼” widths, tape over the white, then paint black over the top. Test fit your cars first. The pool floaties are beads, the silver arch was part of a cottage cheese lid.
8. Glass
Use an old brush to paint glue on the inside of the structure.
Mark two sheet protectors using the width and length of the template from step one. You should have four clear rectangles. Use an old brush to paint glue on the inside of the structure. Place one at a time. Add the roof last.
9. Elevator
Add elevator occupants before gluing the lid. Yes, they’ll be stuck forever, hahaha!
Cut a clear tubular container to size. Paint the floor and lid black. Add occupants before gluing the lid. Paint doors for all floors silver, add black edging for detail. Paint bamboo skewers and toothpicks black for elevator guides & cables, and awning supports. Cut and fold thin cardboard for the awning.
10. Play
Unintentional selfie
Bring, paint or buy a few little figures, cars and maybe a helicopter. The Rogers & Rockwell Hotel is now open and ready for guests. Sound effects not included.
For more tips and scratch-building information (including the Happy Tree signs art featured here), email dave@masoncounty.com with your feedback. You may also visit http://www.CraftyTimeWithDave.com for more tutorials and photos. Happy crafting!


