


Crafty Time by Dave Pierik, Shelton-Mason County Journal
Fun with Ponds and Streams!
Water features are fun and easy to create. You don’t even need to use a ruler.
You will need:
Tools: scissors, paintbrushes
Materials: cardboard, masking tape, sand, school glue, acrylic paints, little twigs, dried moss
1. Mark & cut
Think about what you want. For this example I decided I wanted one fairly large pond and two curvy stream sections similar in size to the roads we made previously, to go under the bridge we made. Streams and ponds are natural, so mark the bases freehand. Cut with scissors.
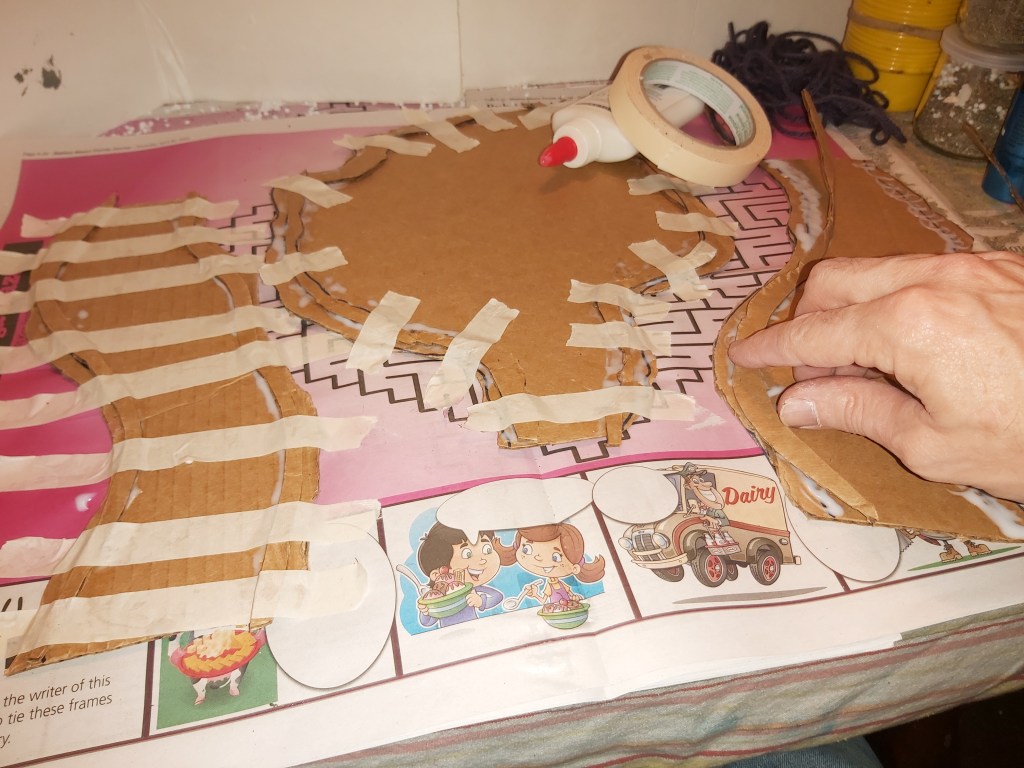
2. Edges
Along the edges you cut earlier, cut extra curvy strips, about a quarter to a half-inch wide. These will be your stream banks and the edge of the pond. They can be in multiple pieces if needed, following along the margin of where the water will be, but leaving an outside edge of about a quarter inch. Glue them down.
3. Tape to clamp
Strips of corrugated cardboard are super bendy, especially with curves like these. Clamp them down with making tape until the glue dries.
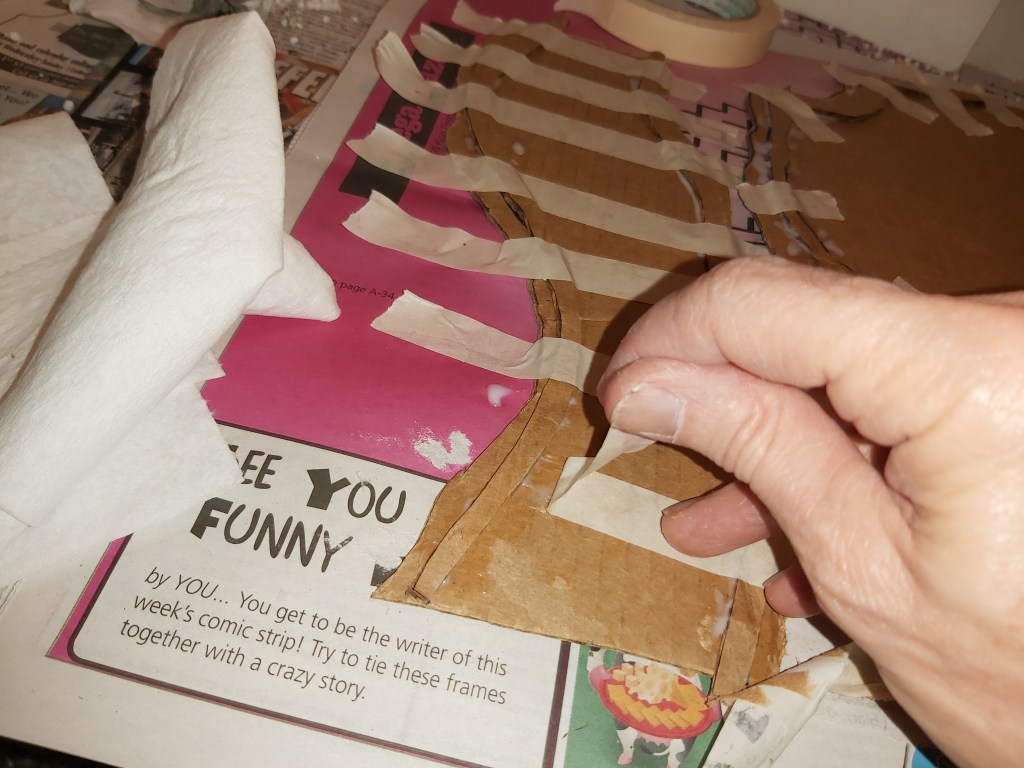
4. Remove tape
Now that the glue is dry, carefully peel the masking tape off. Be careful not to take too much extra material off with it. Pull it sideways, not too fast.
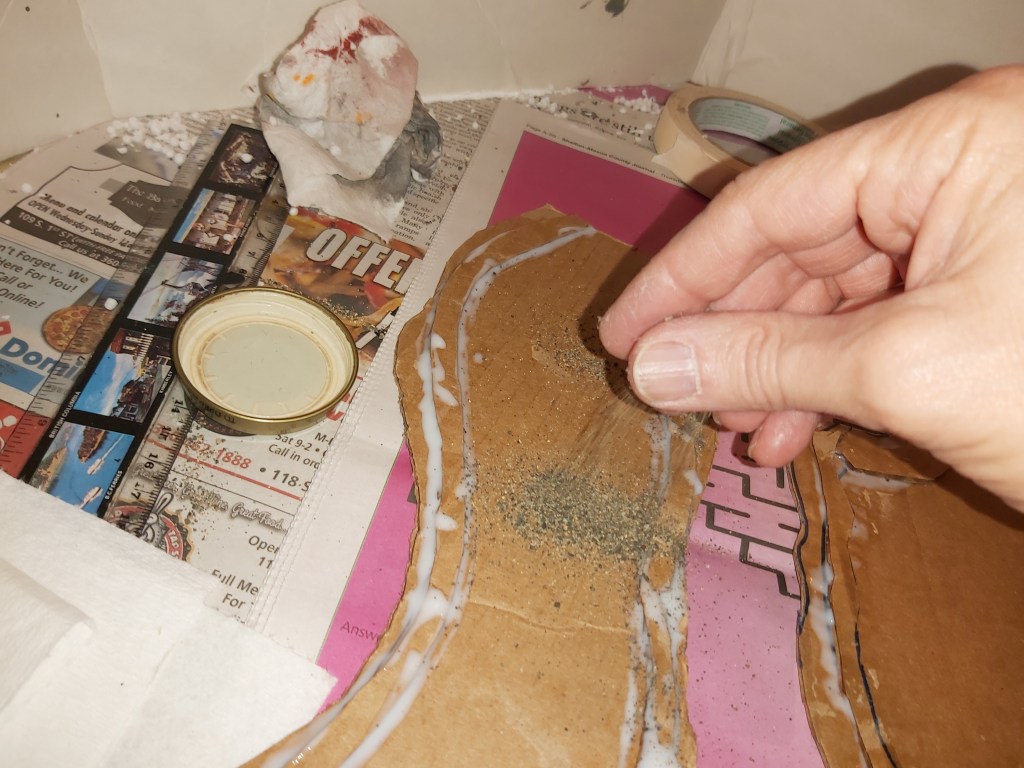
5. Sand flocking
Run a fairly heavy bead of glue along both sides of the strips, enough to cover most of the corrugated sides of the cardboard. Now sprinkle plenty of sand on the wet glue. Shake off the excess and you’ve completed the flocking step. Let dry.
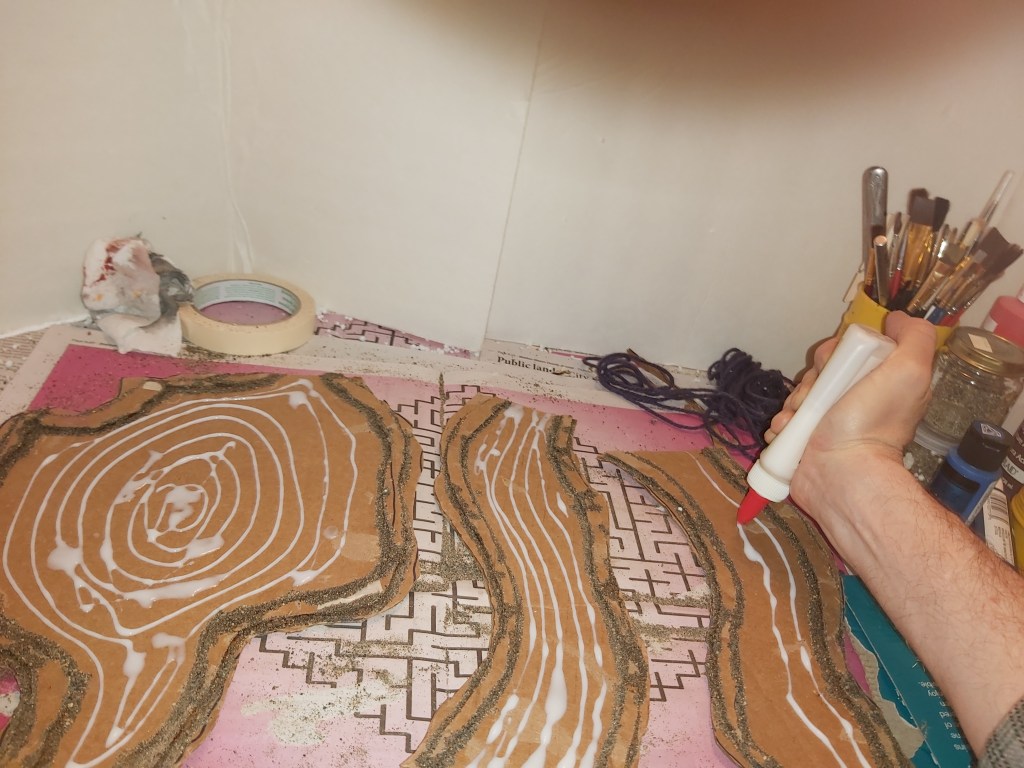
6. Raised features
Brush and blow any extra sand or grit from where your water will be. On the clean cardboard, squeeze lines of glue in the directions the water will look like it is going. Let dry.
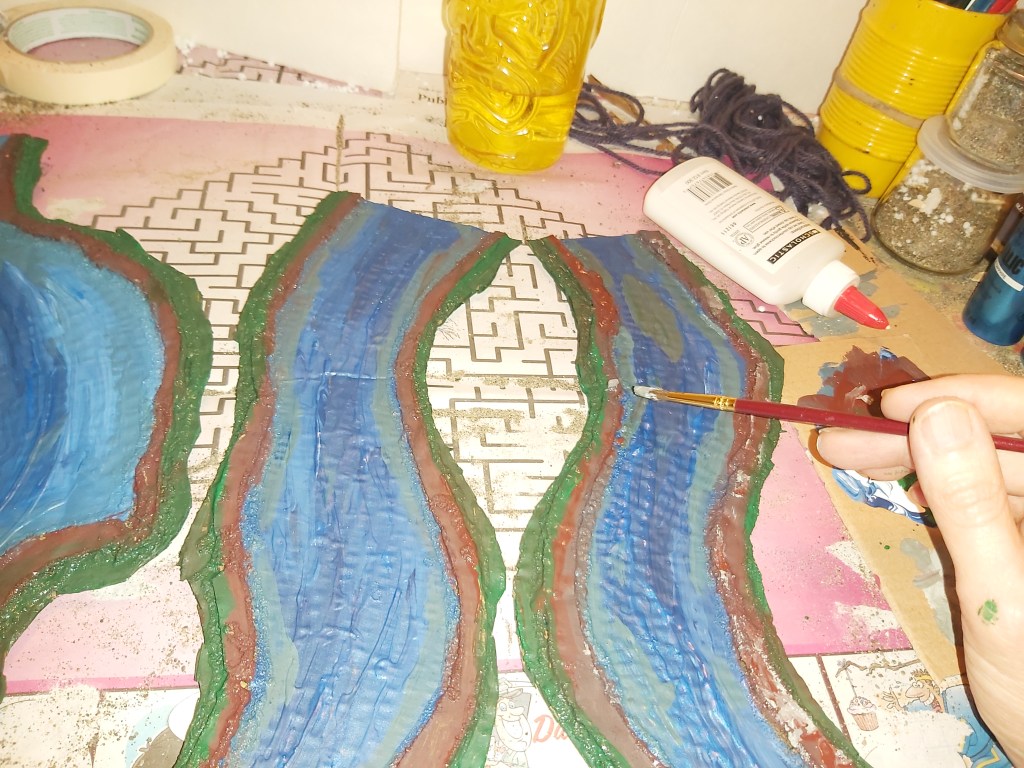
7. Basecoats – blues
In nature, water includes blue but includes lots of colors and reflections. For this example, I glopped two blues and a white onto my cardboard palette and spun them around a little with a big brush. Paint the darker areas toward the middle.
8. Mixed basecoats
The water’s edges should be browns, tans and grays for the silt and sand look. The outside edges should be greens. While you have all of these nice wet paints going, carefully mix just a little of this color back into the water near the banks.
9. Pick out detail
With a smaller brush and white paint, highlight the tops of the waves you made earlier. Don’t overdo it.
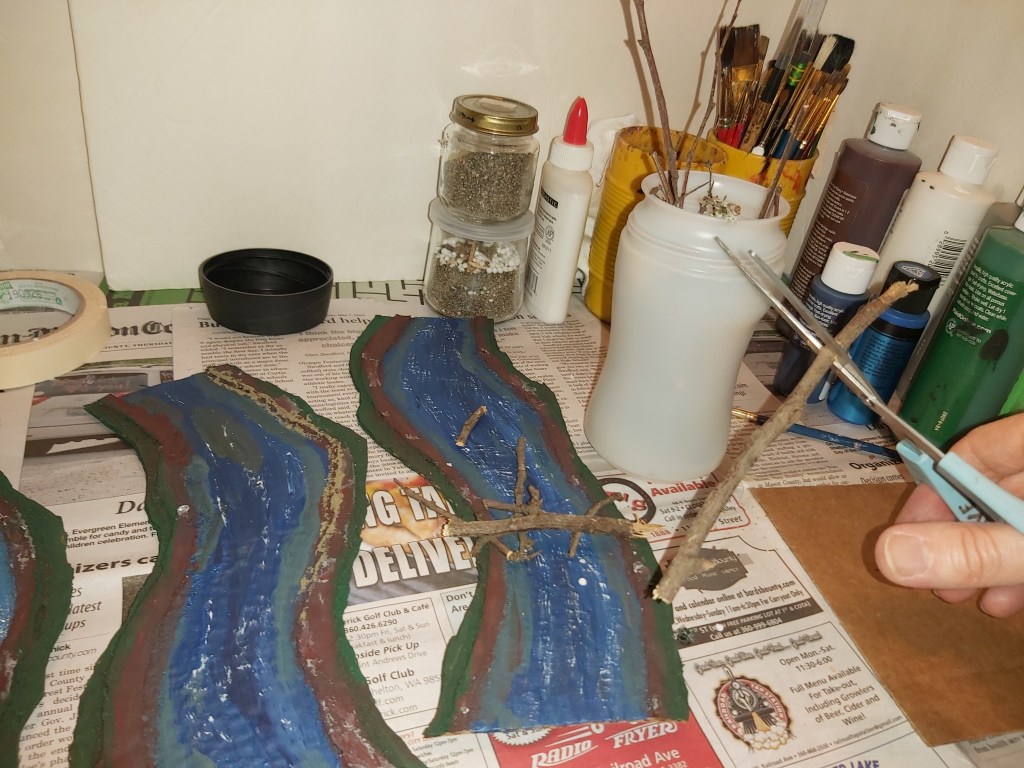
10. Trim little sticks
If you had fun making trees last time, you still have some dead little twigs and dried moss and lichen in your bits box. Cut several of them down to even smaller sizes. Also, carefully split a few of them down the middle so they will appear sunken in the water.
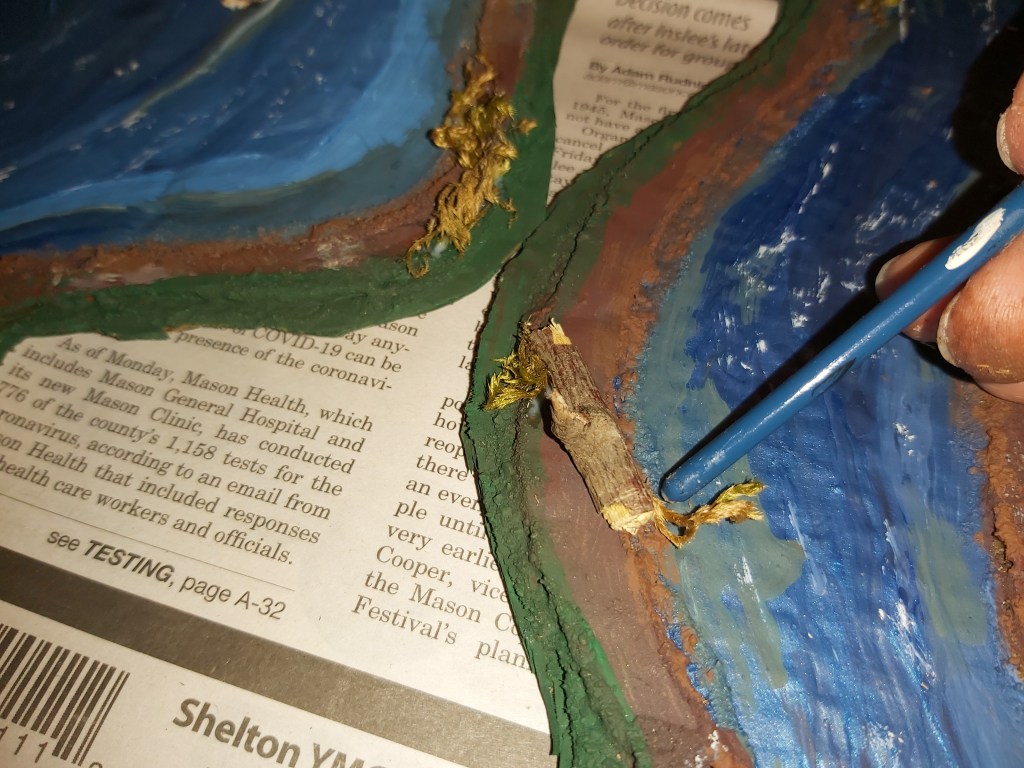
11. Glue and place details
Put glue down first, and then carefully push your sticks and foliage into it. You can use the back end of a paintbrush for better control. With a small brush, paint any other color details as you see fit. Let dry.
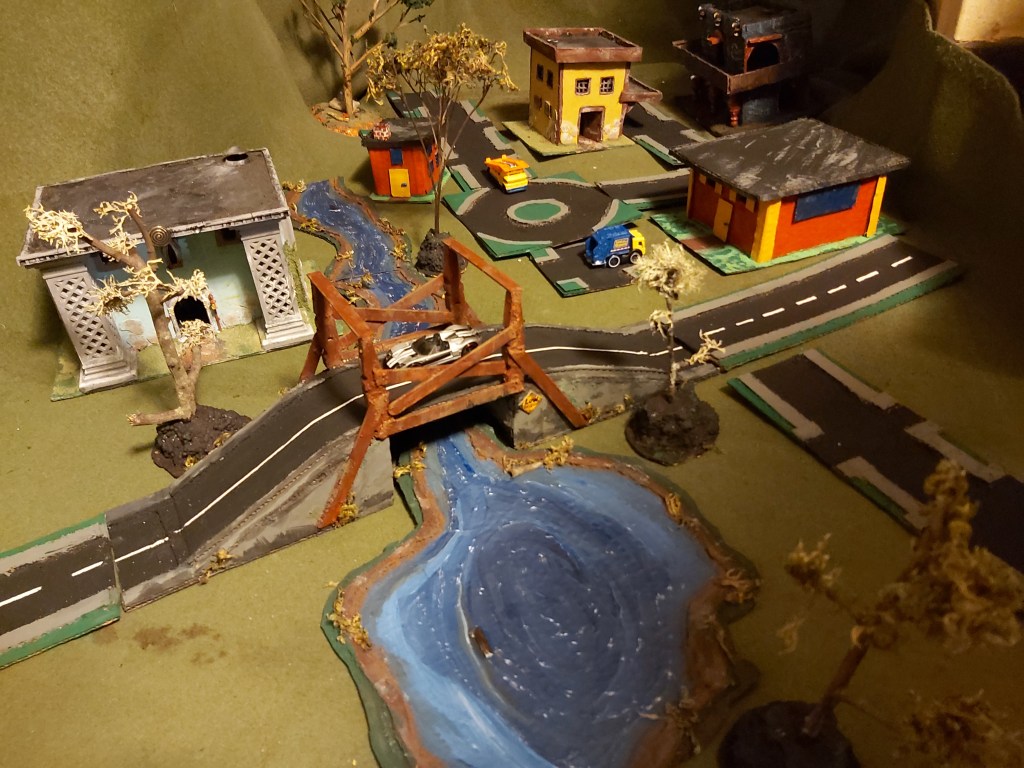
12. Happy Tree Creek
Our growing village feels much more complete now. So far we’ve crafted buildings, roads, trees, a bridge, a pond and a stream using mostly cardboard. What imaginative adventures we could have in our diorama town!
What would you like to see next in Crafty Time? Our village is mostly houses, so it could use a wider variety of buildings. Reader requests keep coming in so please email your feedback to dave@masoncounty.com or call 360-426-4412.
